
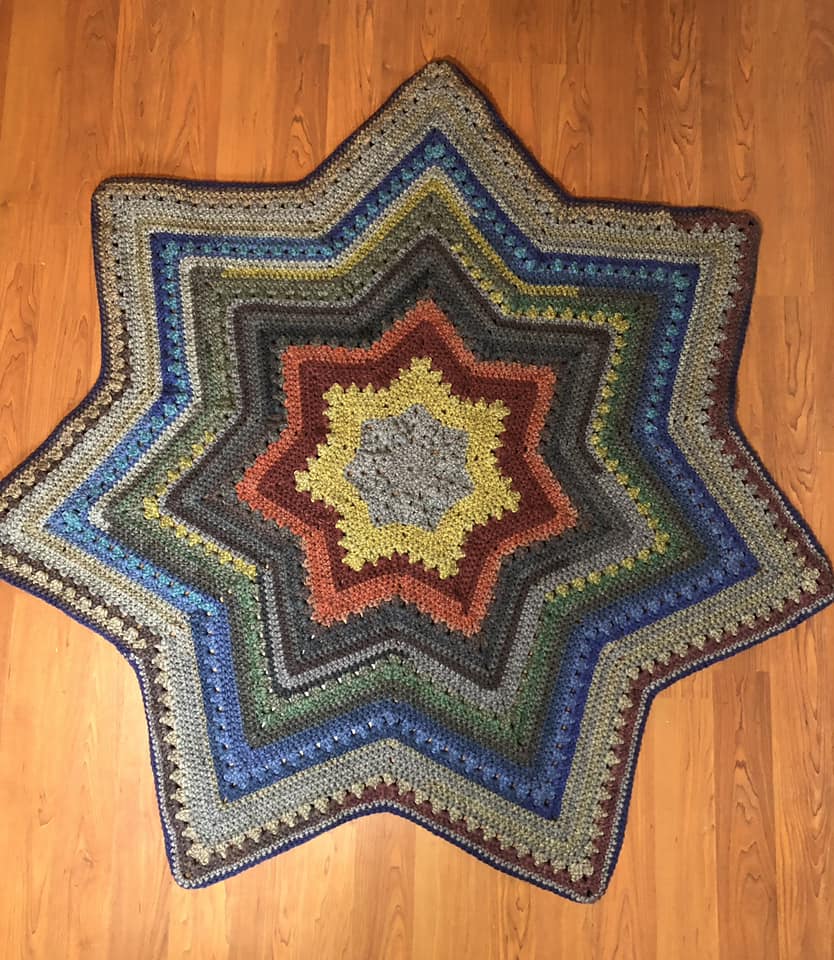
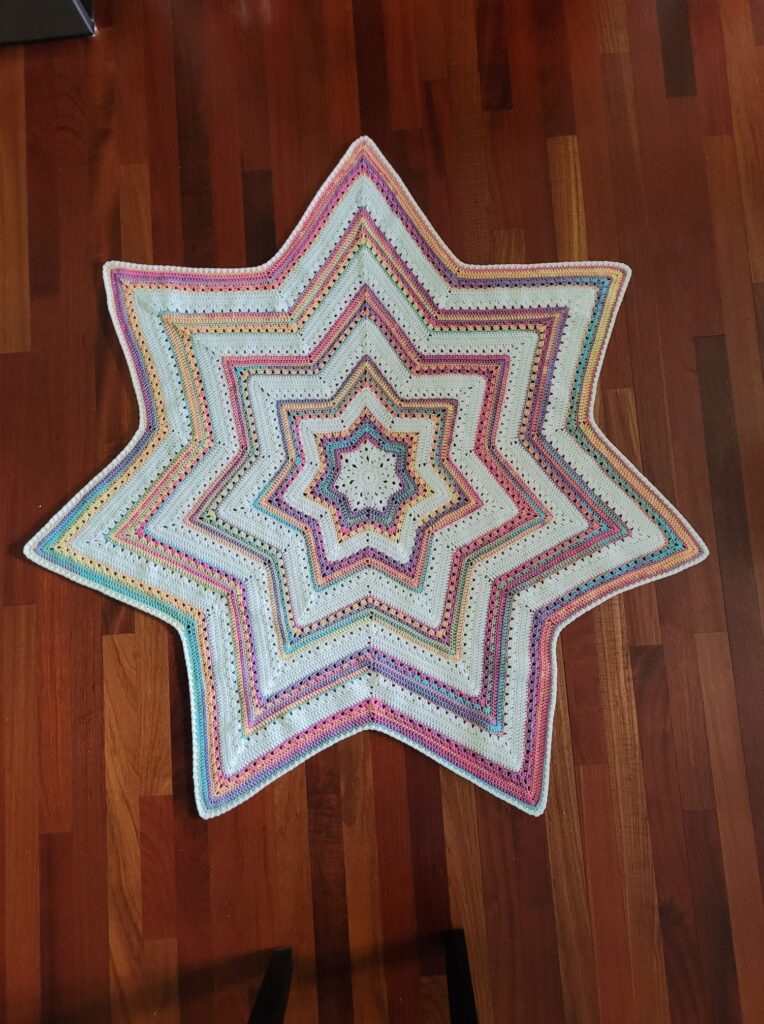
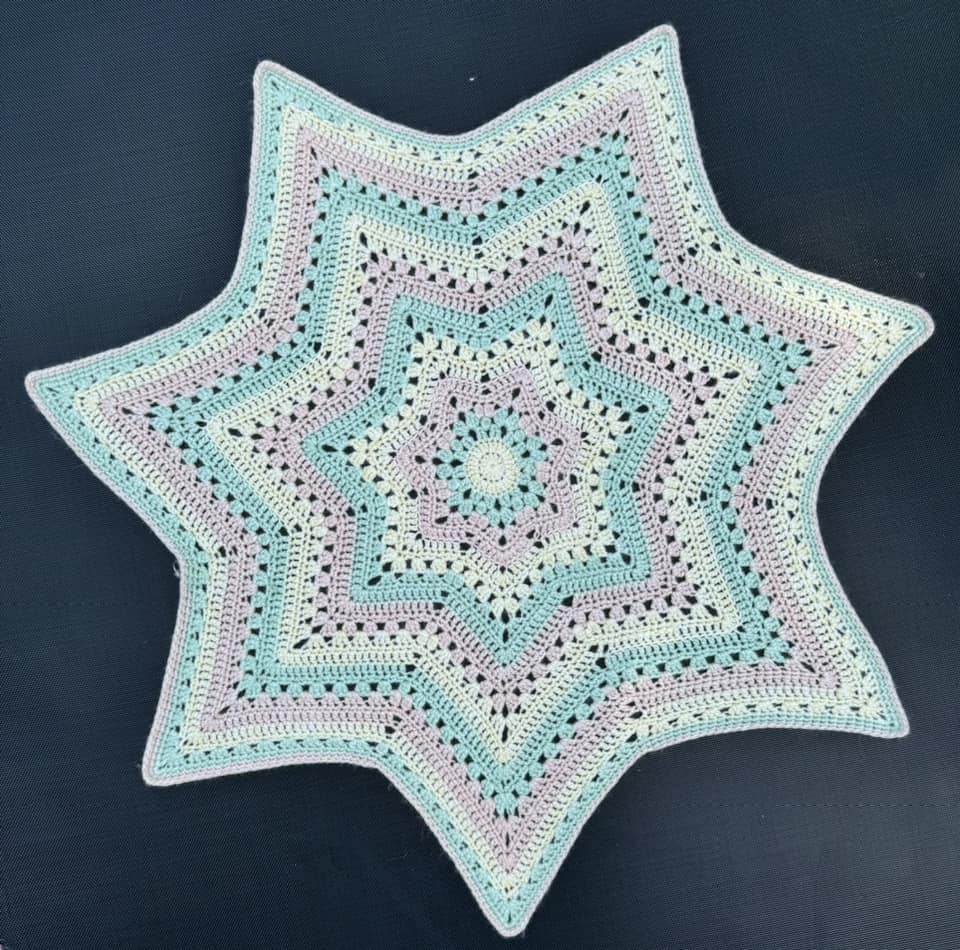
6-Day STAR Blanket™
A variation of the classic crochet pattern the
6-Day Kid Blanket by Betty McKnit®
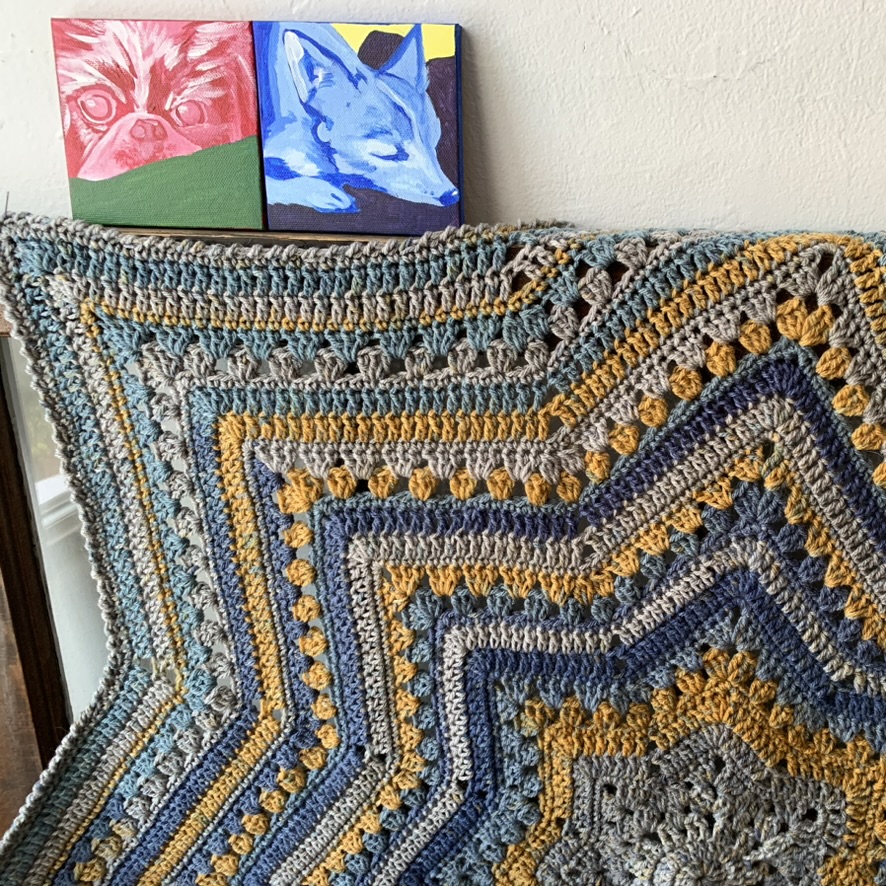
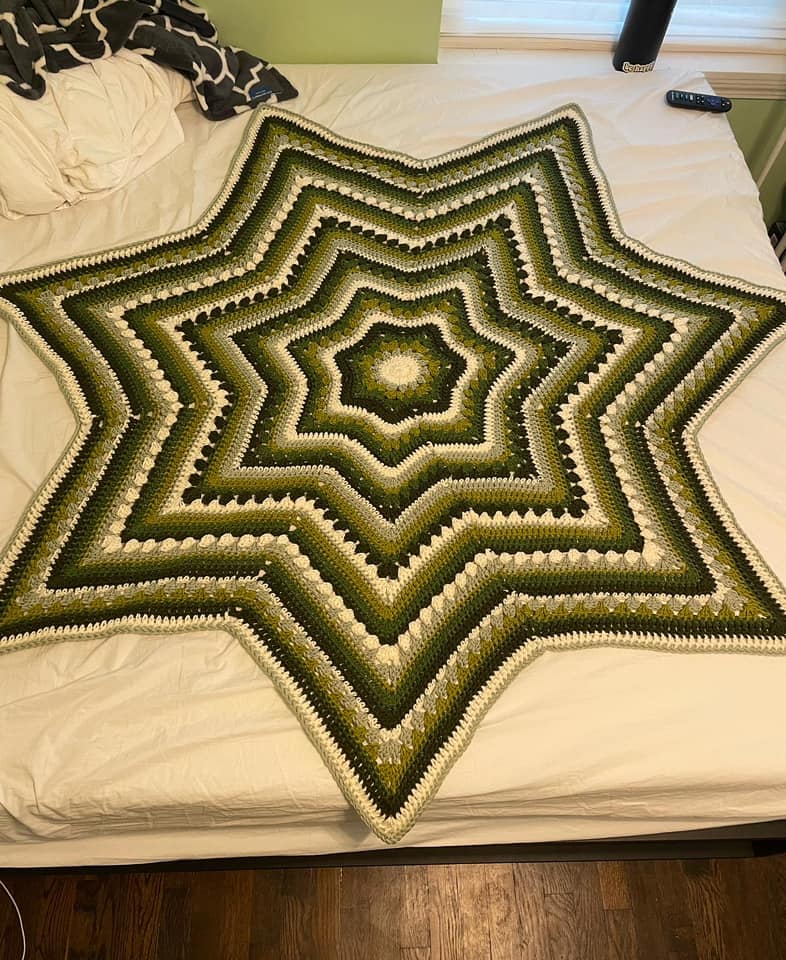
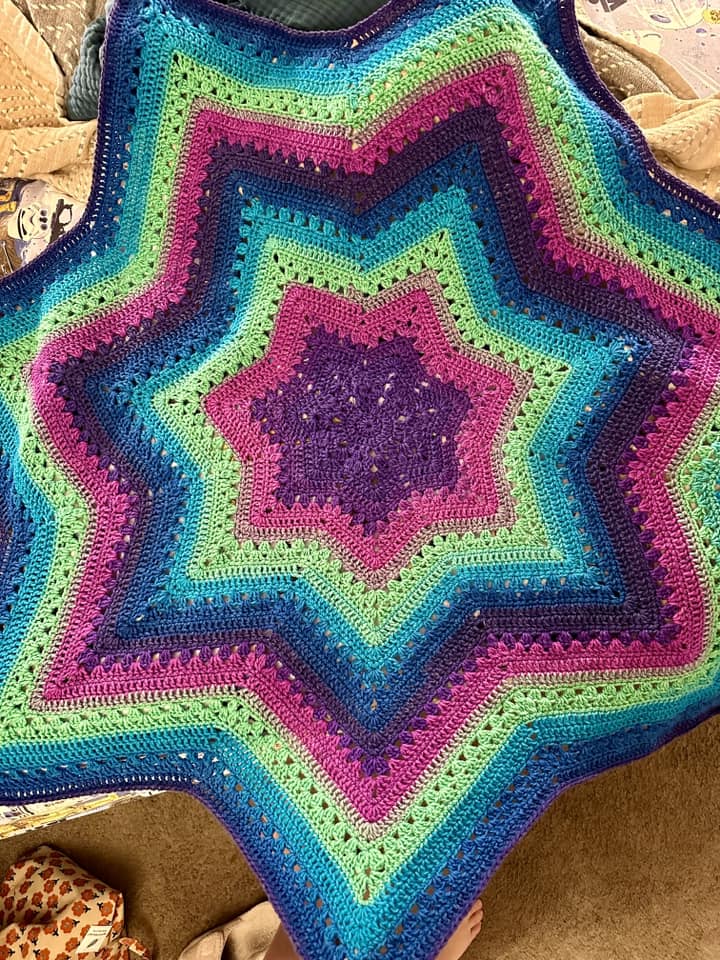
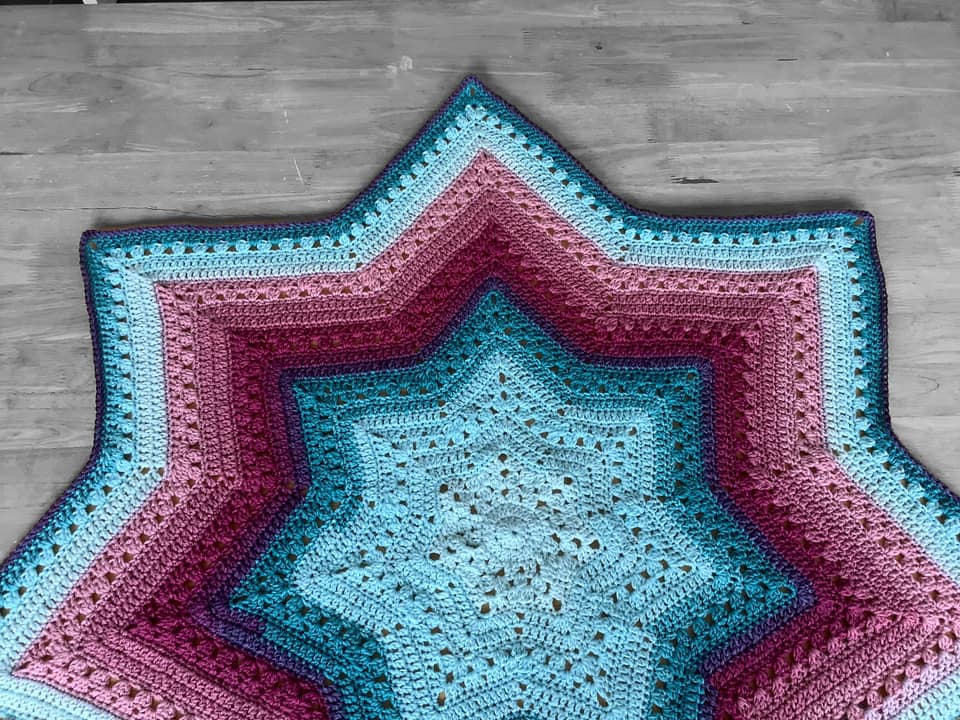
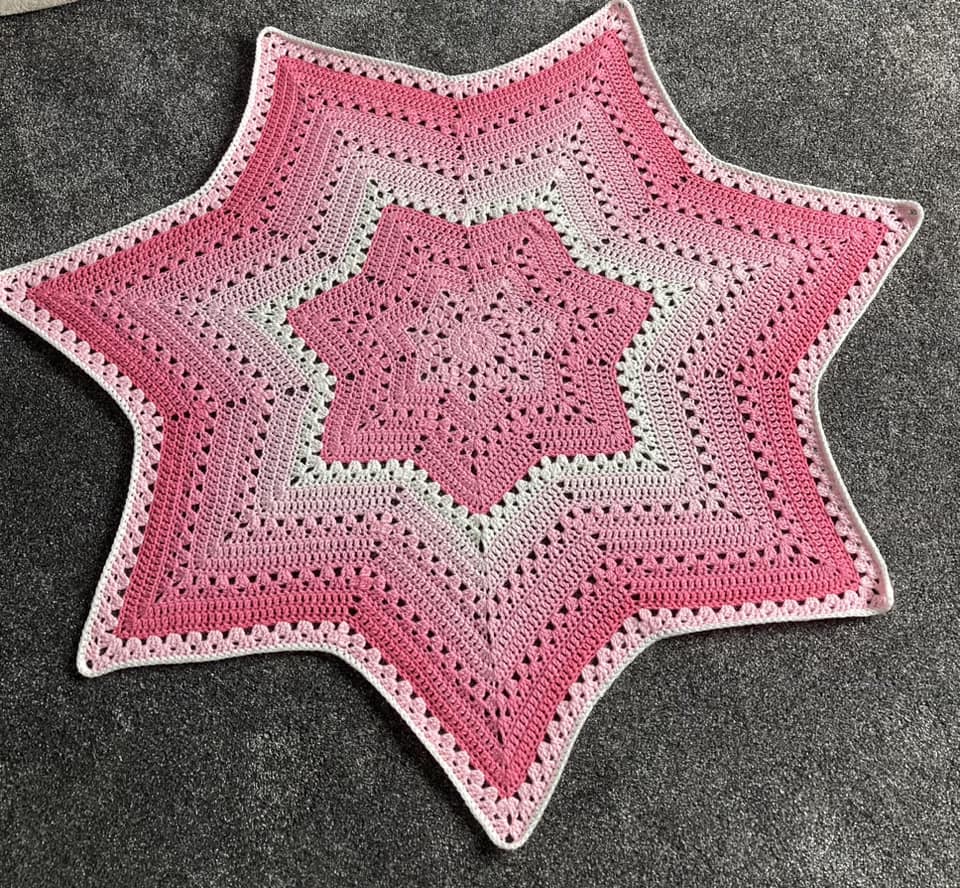
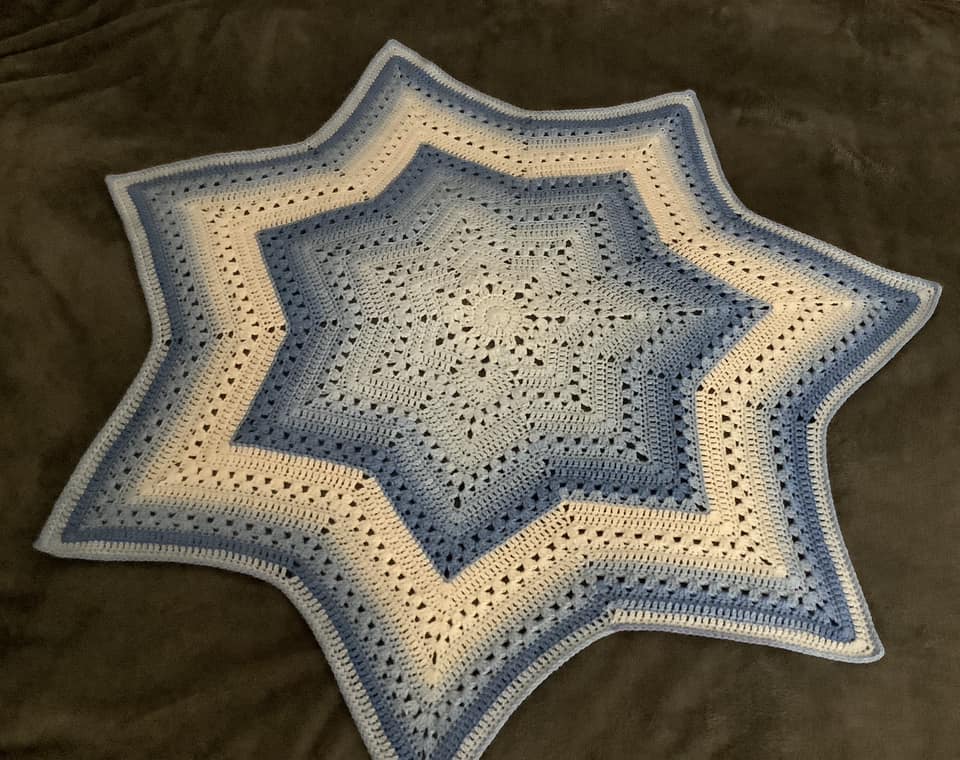
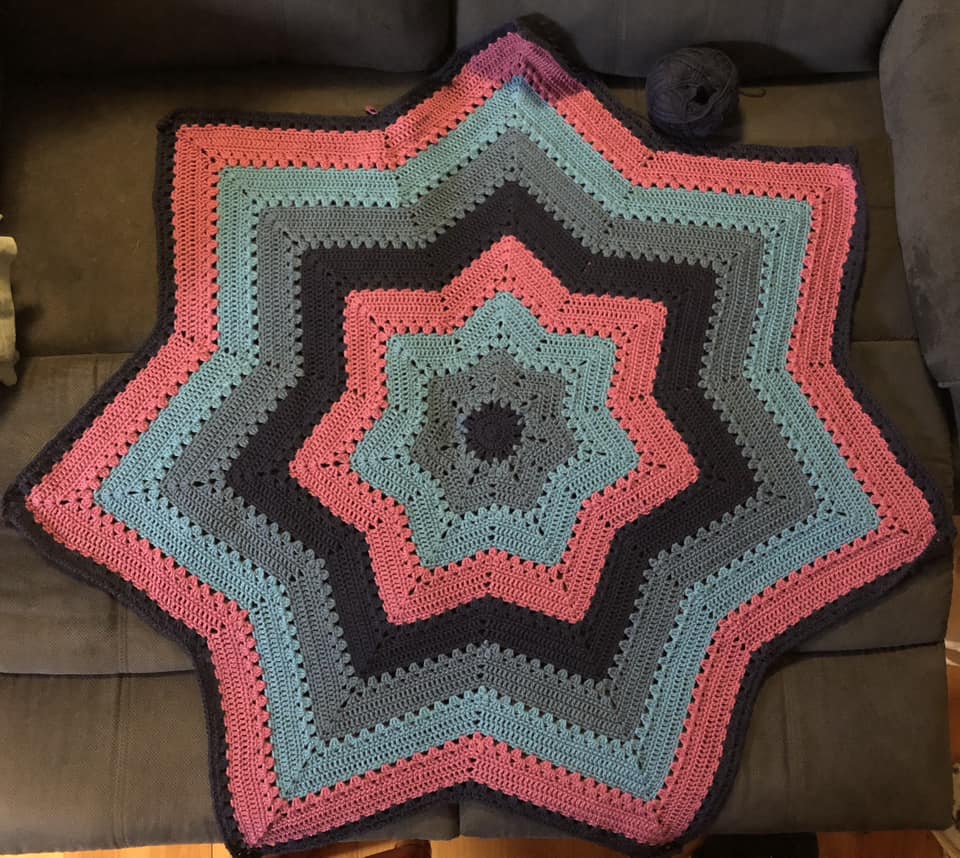
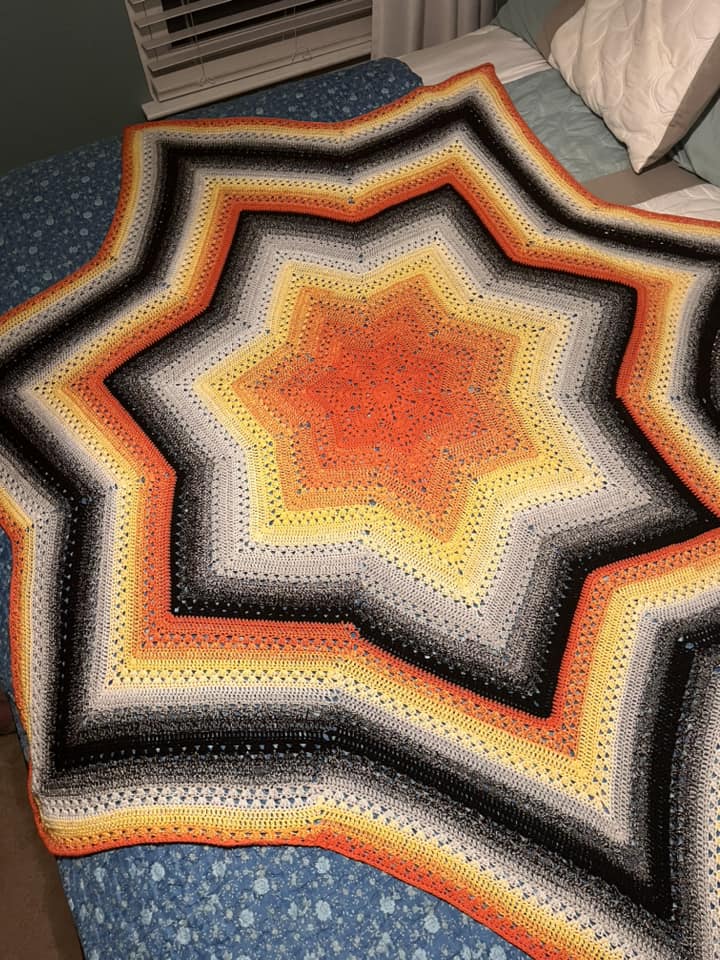
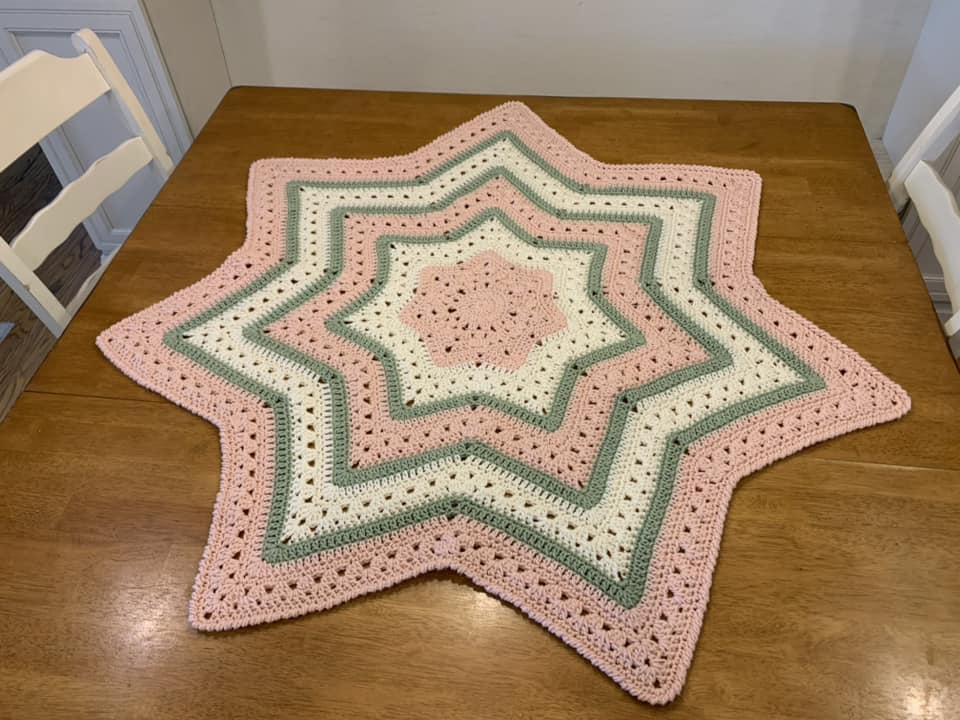
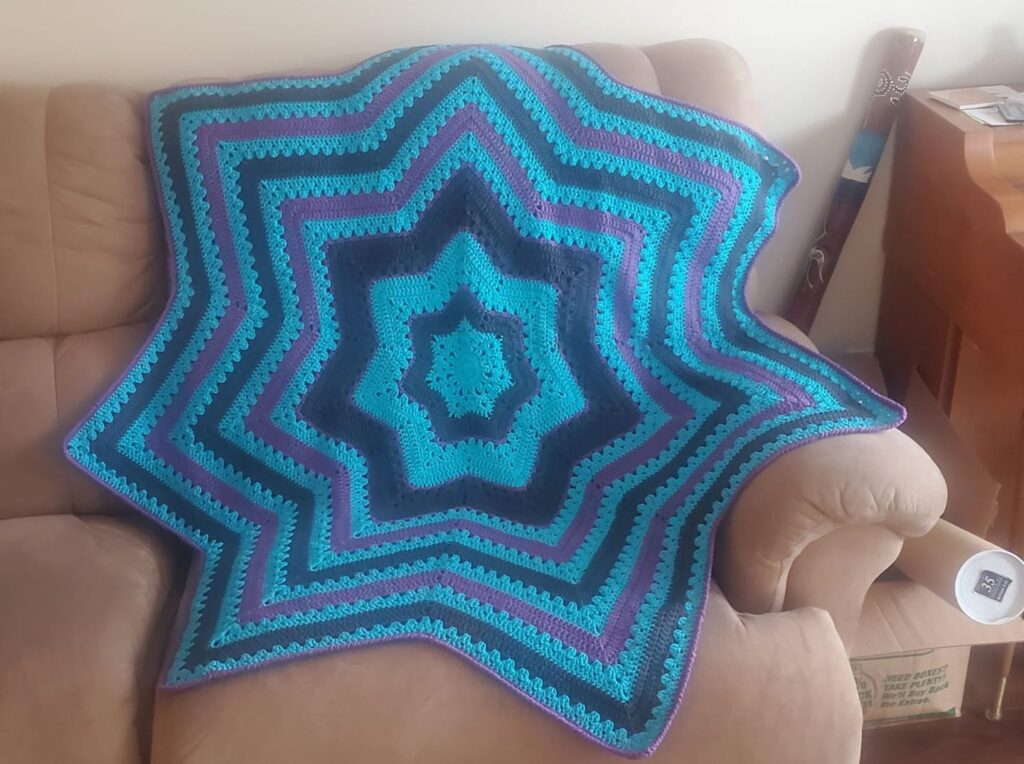
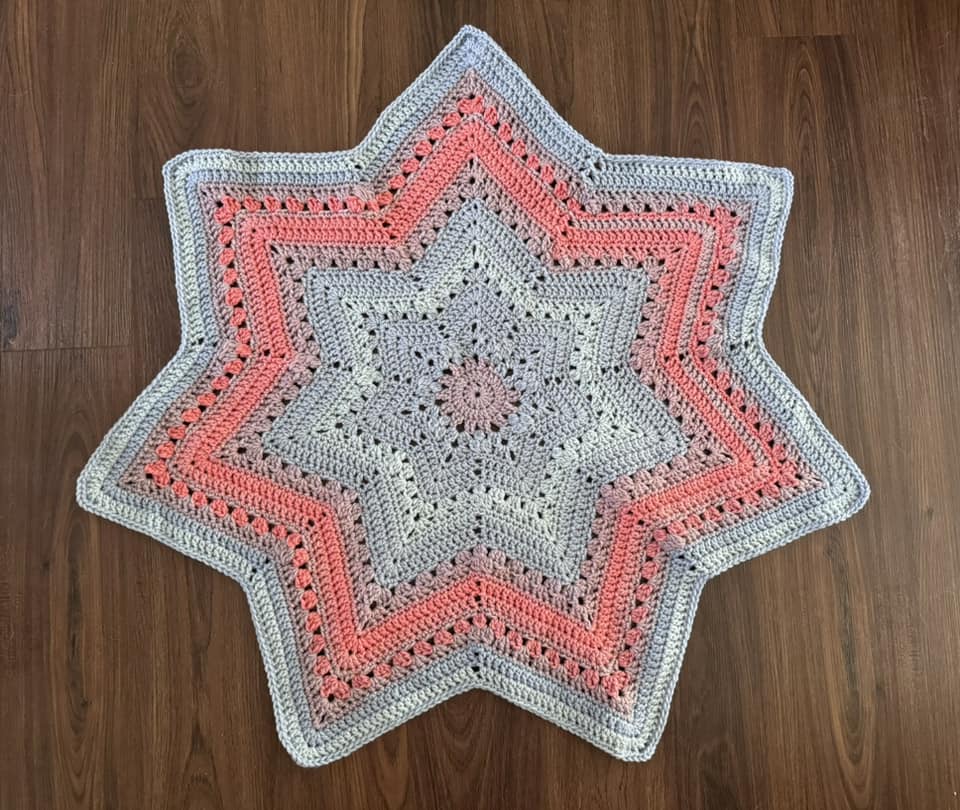
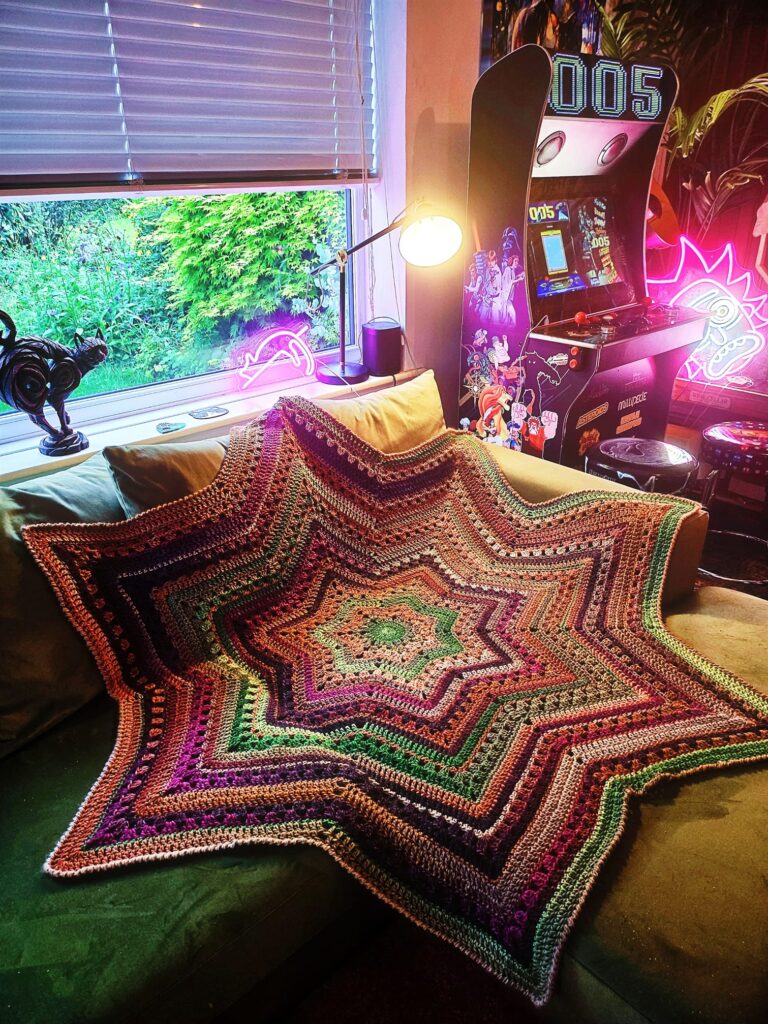
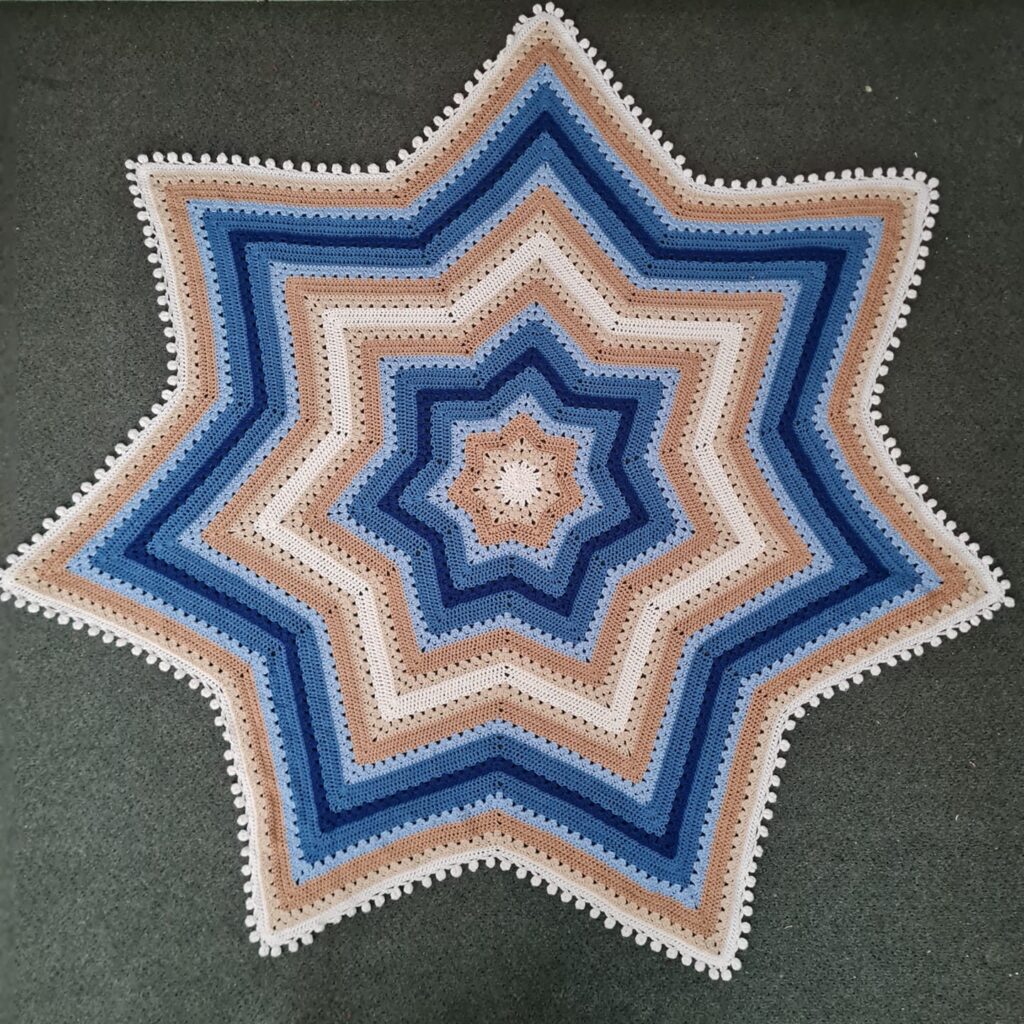
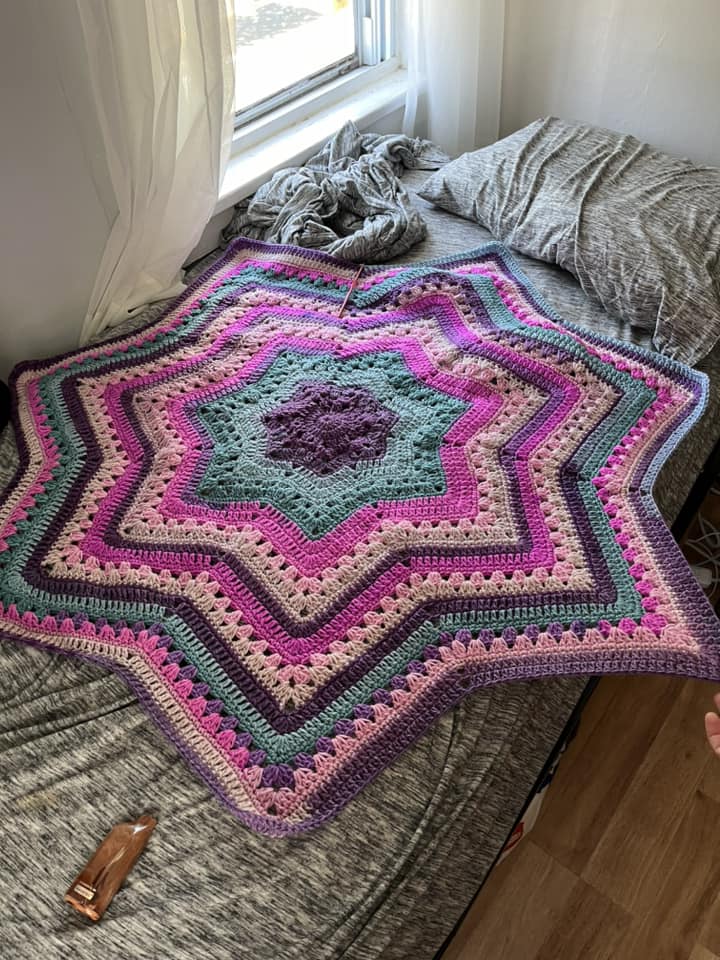
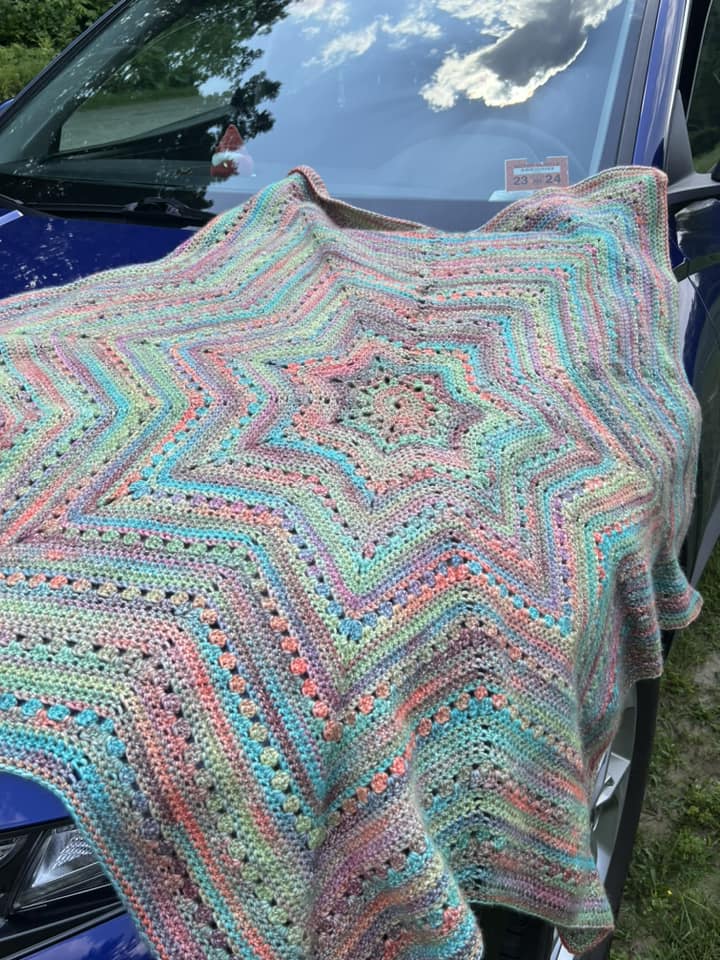
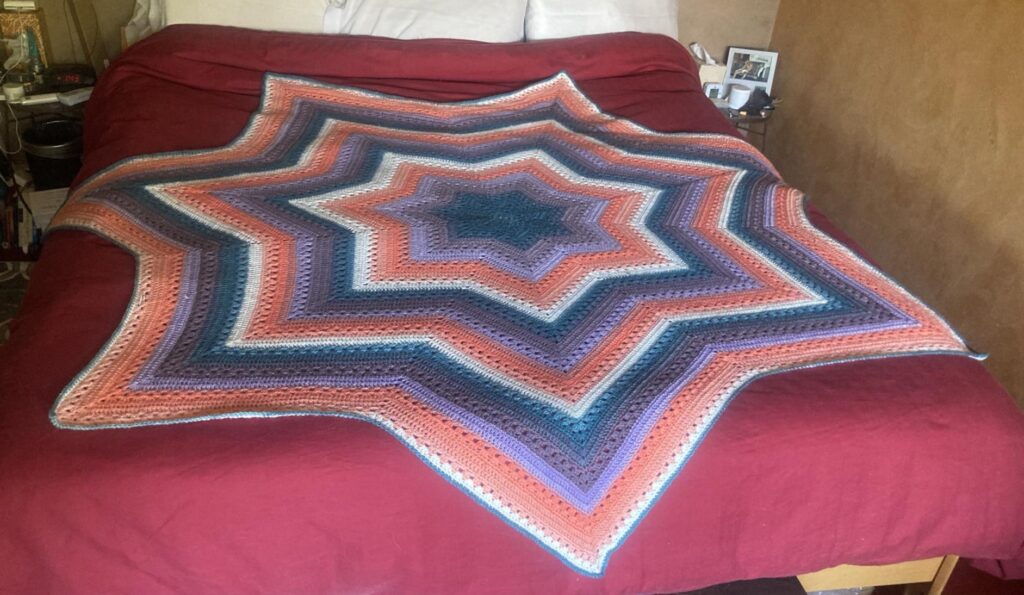
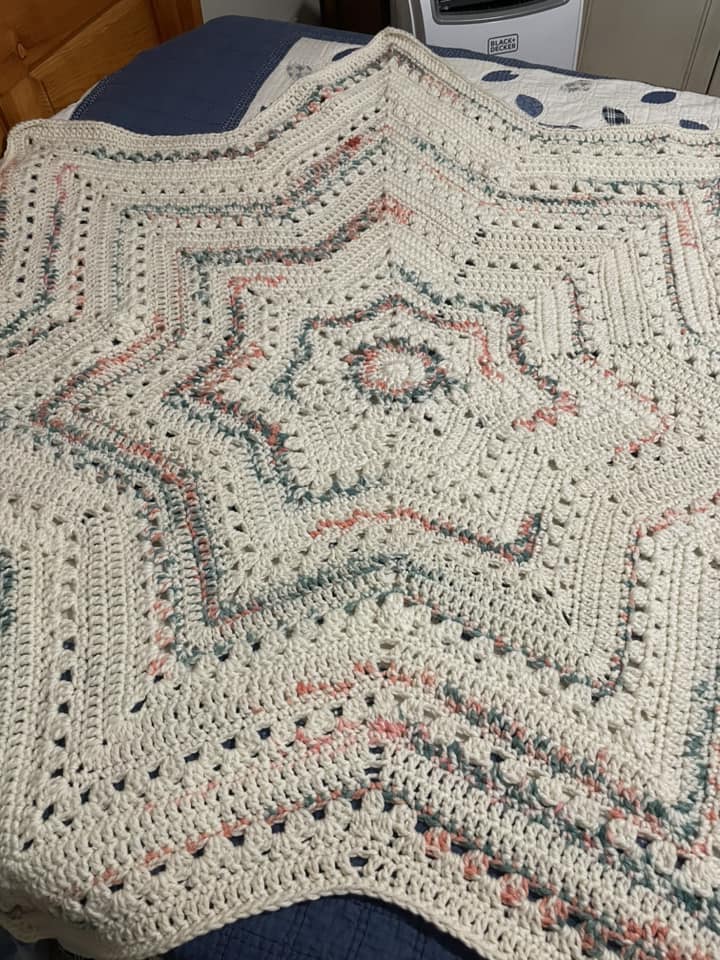
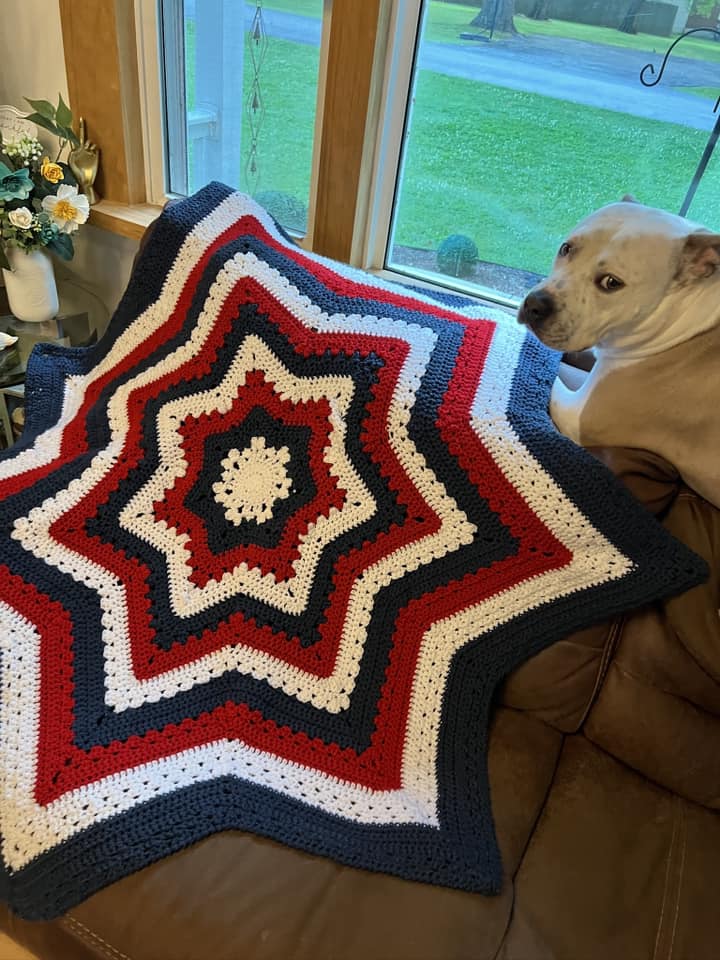
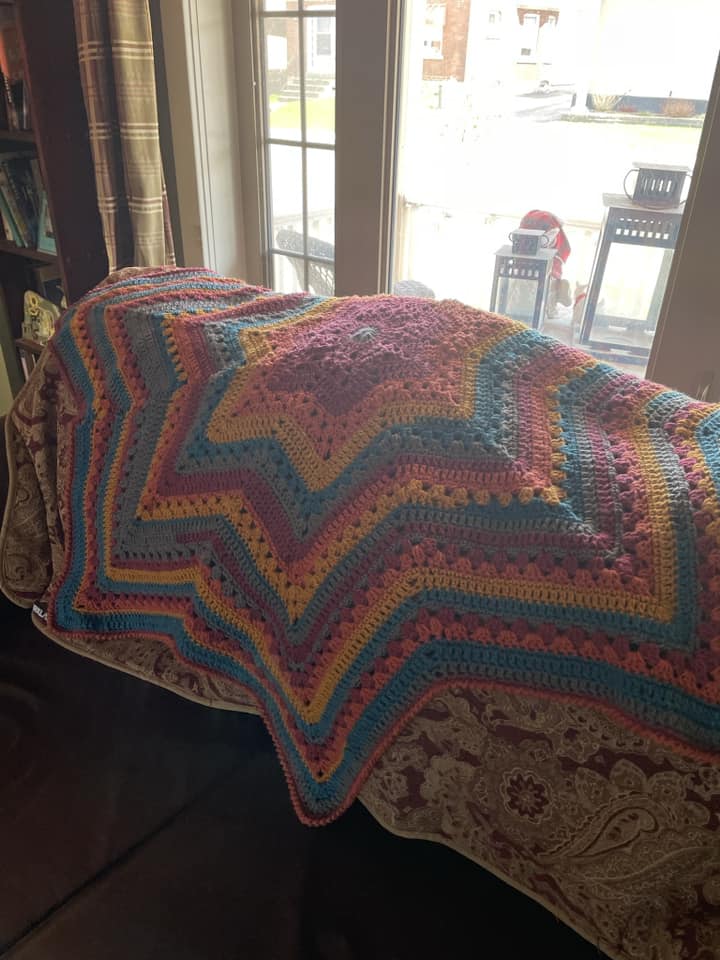
This viral sensation is a variation of the classic 6-Day Kid Blanket by Betty McKnit. It works from the center out into the shape of seven-pointed star. As it turns out this version is just as fun and addictive as the original! No one can make just one 6-Day Blanket. And yes, most crocheters can complete a blanket in only six days.
This pattern is provided free with advertisements on this page. If you would like an ad-free .pdf, you can purchase one at the bottom of the page. The .pdf is the same as this pattern, with the exception of the ads.
This page contains affiliate links. If you click these links and buy something on the page they take you to, I may, at no additional cost to you, earn a commission. I only affiliate with products and companies I feel good about. Thank you for your support!
Introduction
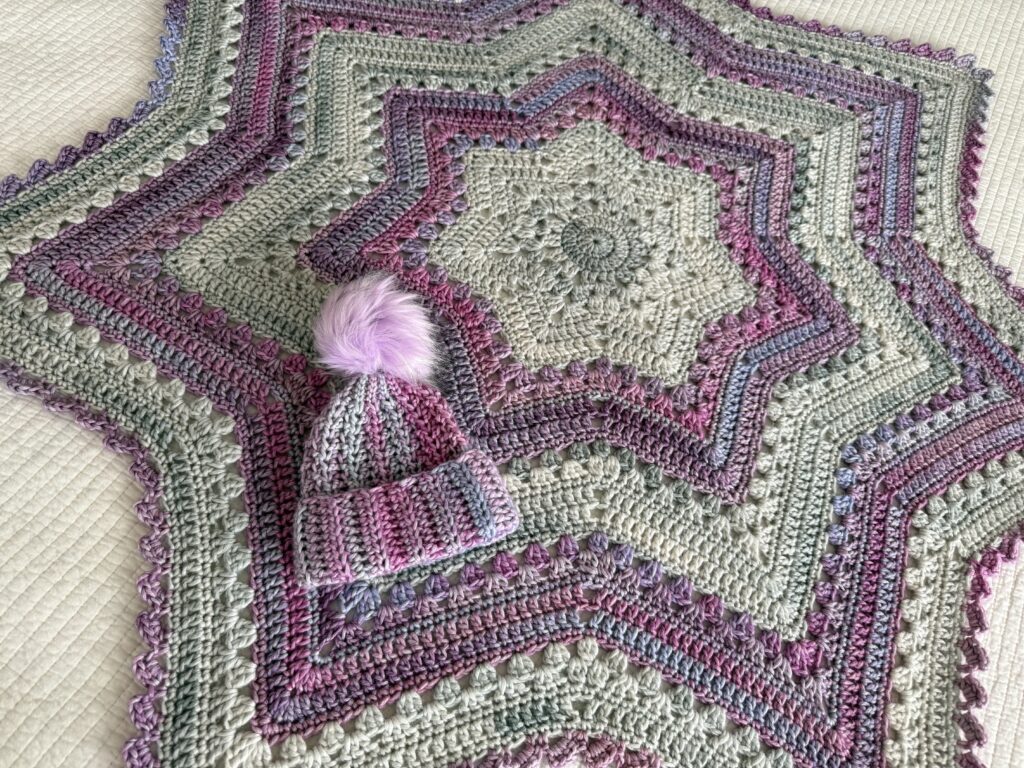
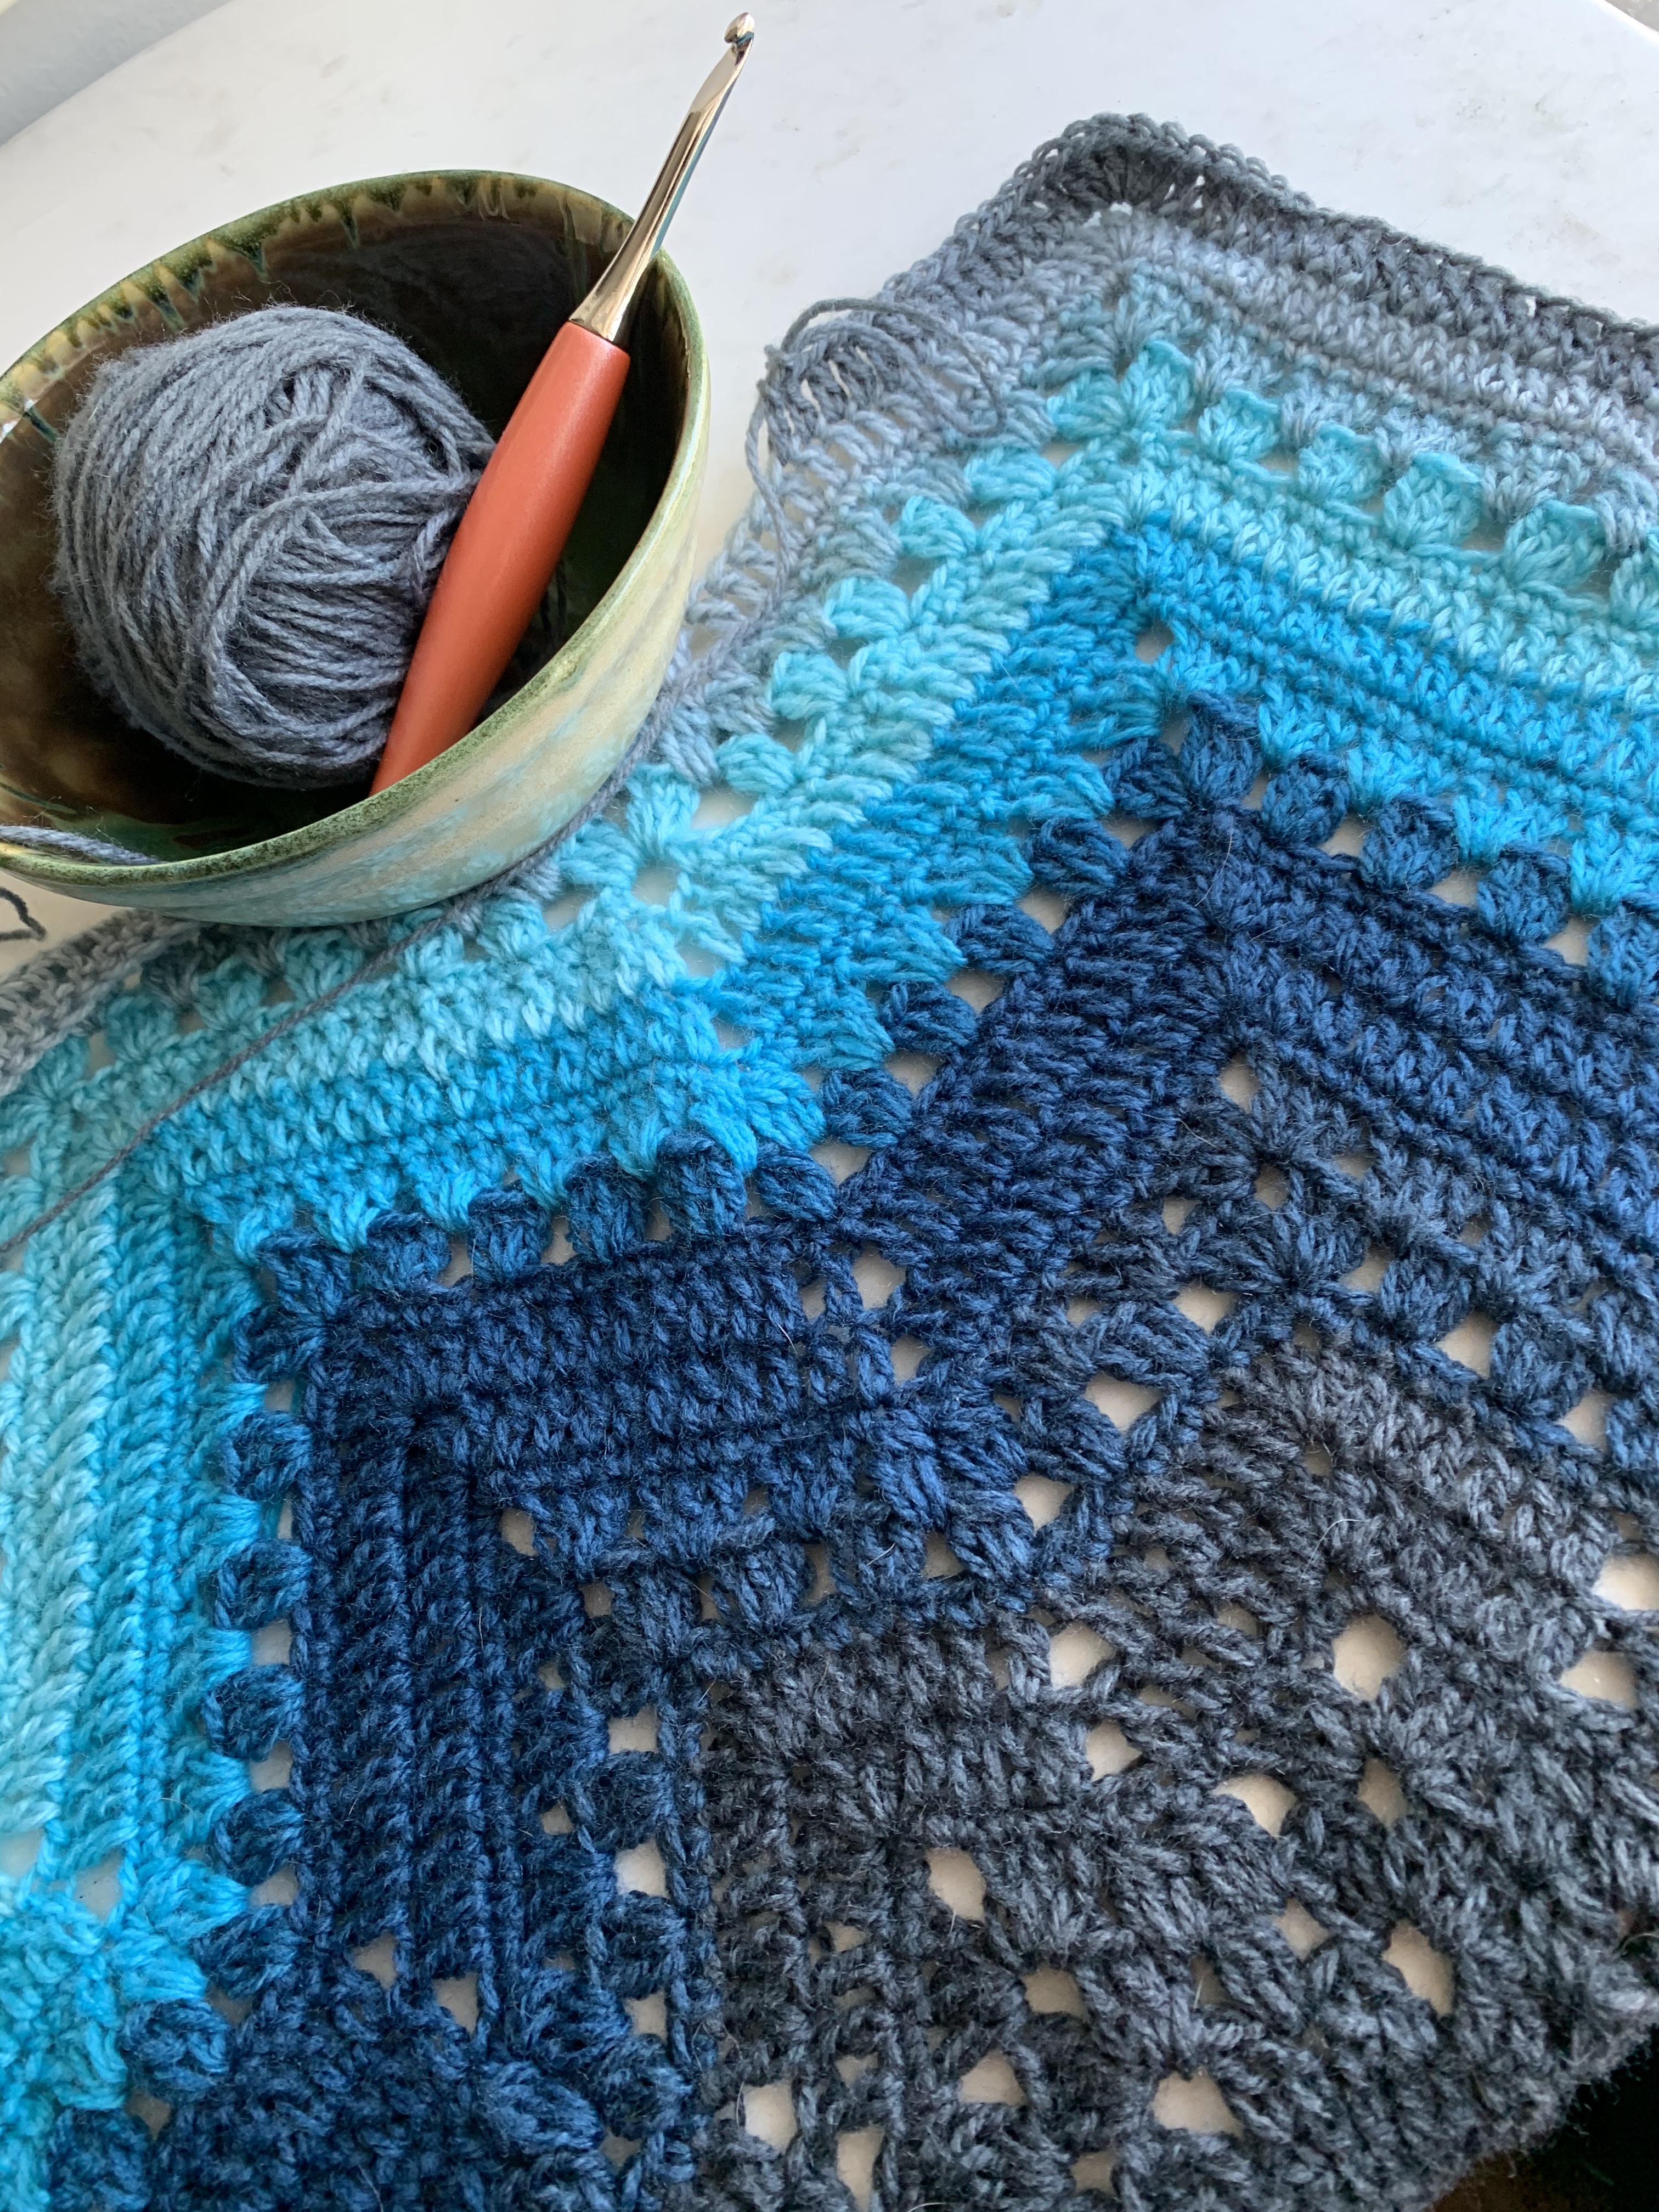
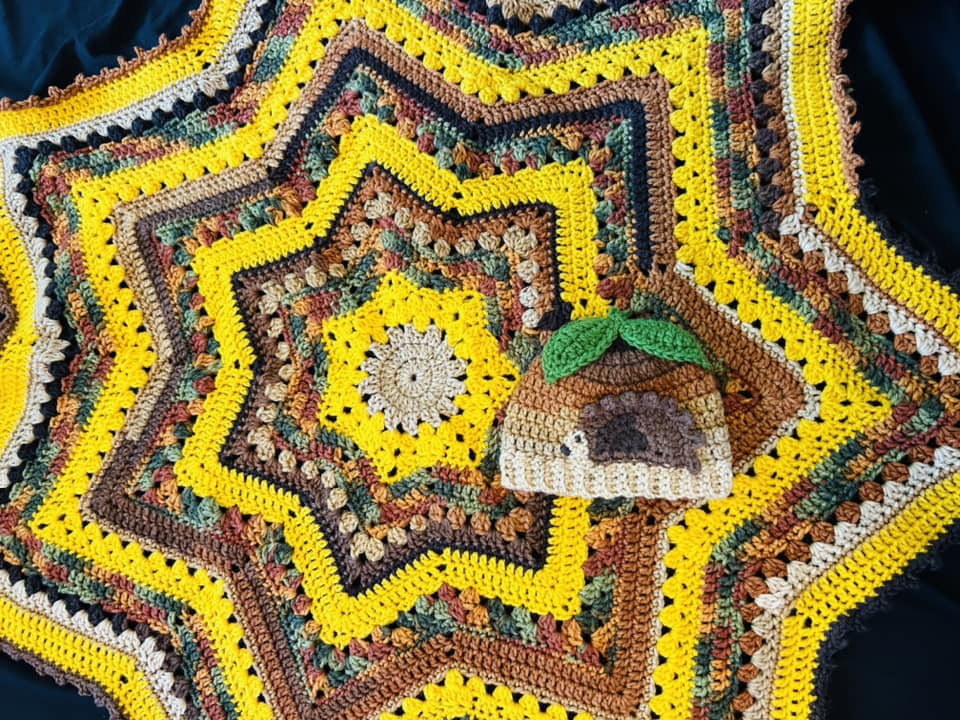
This fun and easy pattern is adaptable, perfect for crocheters of all levels of experience. It is easy enough for new crocheters and interesting and addictive for the more seasoned. This blanket can be made in virtually any yarn, can be striped any number of ways, and you can stop at 12 rounds for a lovey size, or continue six repeating rounds to grow your blanket as large as you want. The border is a very simple reverse single crochet.
What’s the difference between this blanket and the 6-Day Superstar, and 6-Day Supernova Blankets?
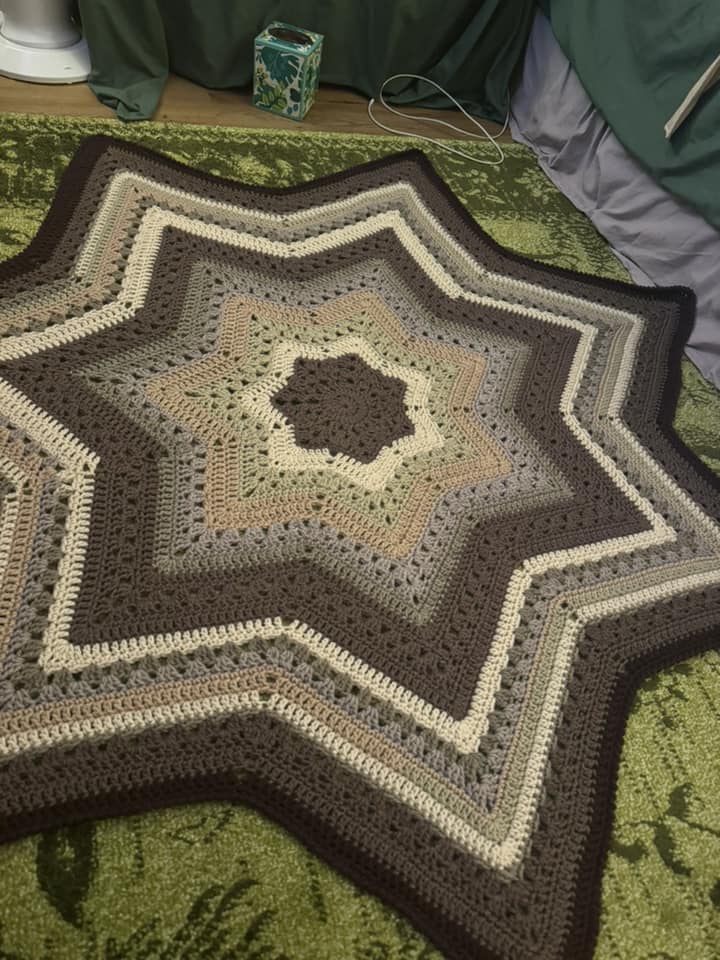
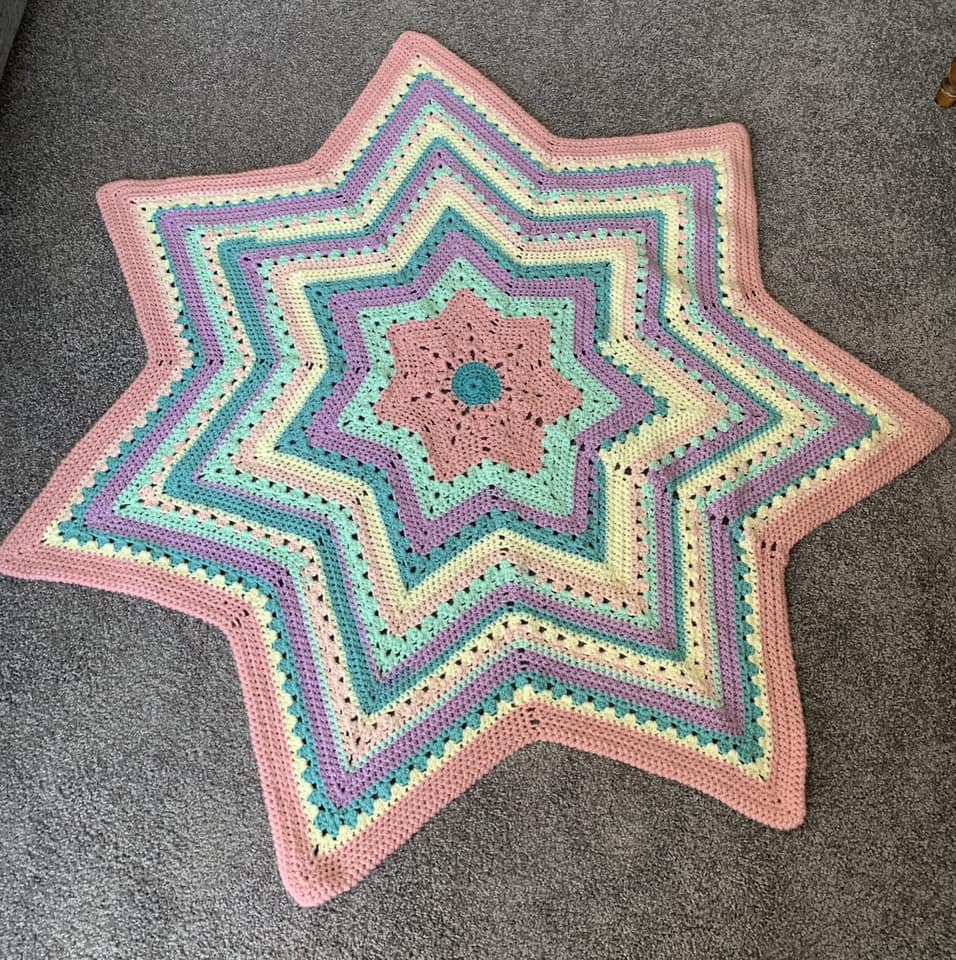
- The 6-Day Star blanket has seven points and is the easiest of the 6-Day Star Blankets. It has eight setup rounds and repeats the same 6 rounds after that. I suggest first timers and new crocheters start their 6-Day Crochet journey with the 6-Day Star.
- The 6-Day Superstar has 14 points and comes out almost circular with chevrons. It has a few more setup rounds than the 6-Day Star that some crocheters find more challenging than the 6-Day Star. Once the setup is complete, it is easy and repetitive, like the 6-Day Star.
- The 6-Day Supernova has a total of 14 points: 7 larger points and 7 smaller points. It isn’t difficult to make, but the pattern itself has lots of different rounds It is easier to understand once you’re familiar with the 6-Day Crochet style. Try the Supernova when you feel comfortable with the Star and you’re ready for a challenge.
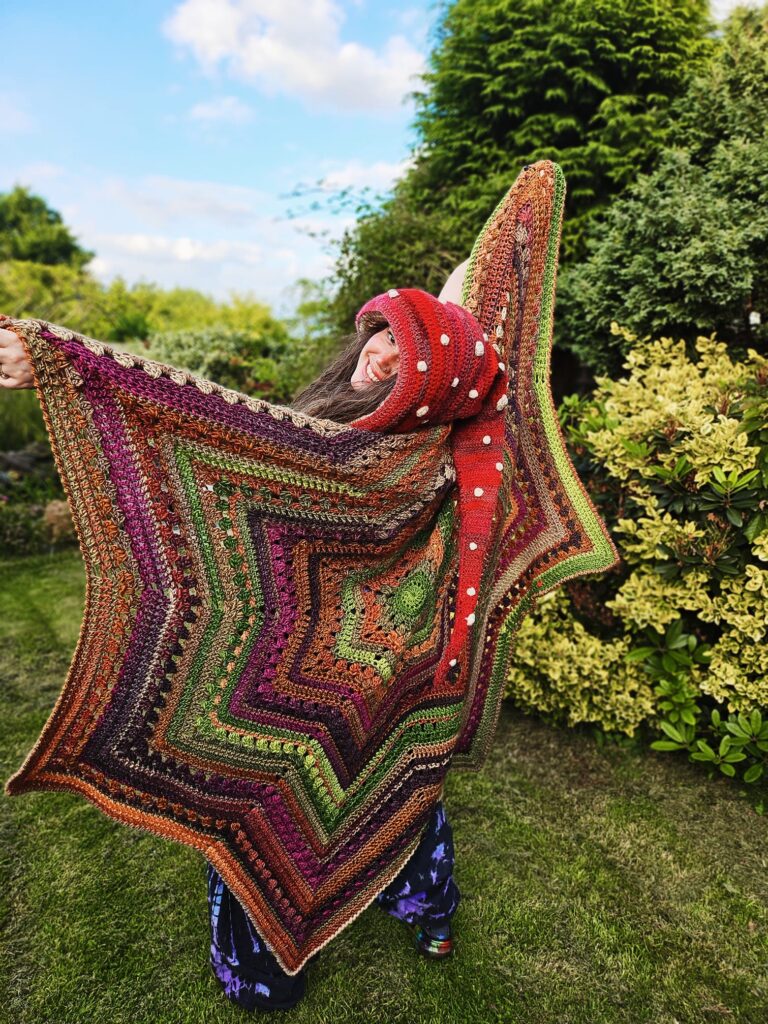
- You can also make a 6-Day Star, Superstar, or Supernova Holiday Tree Skirt, a 6-Day Star, Superstar, or Supernova Shawl. Keep an eye out for more pattern adaptations from the 6-Day Star Blanket.
Details
US Terminology with UK Conversions given
Finished Size: Variable
Skill Level: Easy
Gauge: varies depending on your yarn.
Materials
Yarn: this pattern works with almost any yarn. Yardage for the most common sizes are below. Check the chart at the end of this pattern for yardage estimates for more yarn and sizes.
- For DK or #3 weight yarn you will need approximately 1600 yards for a 40” baby blanket and 2800 yards for a 60” throw-sized blanket.
- For Worsted or #4 weight yarn you will need approximately 1500 yards for a 40” baby blanket and 2500 yards for a 60” throw-sized blanket.
Hook
Two hooks: one .5 mm larger than recommended on the yarn label
another .5 mm larger
You will need a slightly larger hook than you might normally use for this blanket. I suggest starting with the hook size suggested on the yarn label, and have two larger hooks on hand, .5 mm and 1 mm larger than the recommended hook.
Start with the smallest hook and if the points of your star begin to curl in the setup rows, increase your hook by 5 mm. I’ve worked my blankets starting .5 – 1 mm above the recommended size and moving up another .5 – 1 mm during the setup rounds if my work curls. Lay your blanket down after each round and make sure it is laying flat. It’s usually okay to increase your hook size after the first round in which you experience curling without ripping back. Check out all of these tips for yourself and lay your work down often and “admire it.”
If your work ruffles you have most likely made a mistake somewhere and added too many stitches. In my experience it is unusual to see a blanket ruffling because the hook is too big. It’s almost always because the crocheter misread the pattern and added too many stitches.
Stitch Markers
Scissors
Yarn needle for weaving in ends

| US terms abbreviation | UK terms abbreviation |
| single crochet sc | double crochet dc |
| half double crochet hdc | half treble crochet htr |
| double crochet dc | treble crochet tr |
Abbreviations
6DKB: 6-Day Kid Blanket
6DSB: 6-Day Star Blanket
ch: chain
dc: double crochet
dc2tog: double crochet 2 together cluster
dc3tog: double crochet 3 together cluster
rsc: reverse single crochet
sc: single crochet
sl st: slip stitch
sp(s): space or spaces
st(s): stitch(es)
Repeats
( ) Work in the same st or sp.
[ ] Repeat everything within the brackets the indicated number of times
* indicates the start of a repeat
** indicates end of repeat on last repeat only
Stitch Counts
- Stitch counts between < >
- Counts for subsequent rounds are given in parentheses like so: first repeat (second repeat, third repeat) etc.
- Unless indicated otherwise, ch 3 counts as dc.
- If your stitch counts are off, avoid the temptation to self-correct without understanding your mistake. The pattern should work out as written.
Special Stitches
dc2tog: (cluster): yo, insert hook in next st, yo, pull up a loop, yo, pull through 2 loops, yo, insert hook into same st/sp, yo, pull up a loop, yo, pull through two loops, yo and pull through 3 loops.
dc3tog: (cluster): yo, insert hook in next st, yo, pull up a loop, yo, pull through 2 loops, [yo, insert hook into same st/sp, yo, pull up a loop, yo, pull through two loops] 2 times. yo and pull through 4 loops.
Does it Really Only Take Six Days?
All of my patterns that use the same six rows alternating rows of sc, dc, and clusters, with or without chevrons, are named 6-Day Crochet. The name of this pattern comes from the original 6-Day Kid Blanket, which was toddler sized and made with chunky yarn, and took me an easy six days to make. This variation uses the same stitches as that original pattern, but you can use any yarn and make it any size you want, so whether you can meet the six day deadline will depend on several factors. It is 100% possible to complete a large blanket in six days. You will love how fast the 6-Day Star Blanket works up.
Tips for Completing in Six Days
To complete this project in six days, it will depend on how fast you crochet, what kind of yarn you use, and what size blanket you want to make. Most crocheters will need to work 2-4 hours each day. On the first day, do the Setup Rounds and the first repeat, after that do at least one repeat per day. Blankets with more than six pattern repeats will probably take longer than six days, or more than 4 hours per day to complete.
First Timers
This is an easy pattern but it is not a beginner pattern. You will need to know how to chain, single crochet, and double crochet. This pattern doesn’t teach those skills, however, there are plenty of resources online and elsewhere to learn them, so even very new crocheters can make a 6-Day Star Blanket once they know a few basics.
You will also need to be brave enough to read this whole pattern and follow instructions. I have very good tutorials on YouTube that will help you, but they are only meant to help with this pattern, they are not a replacement for it.
Setup Rounds, Round Numbers
There are dozens of 6-Day Crochet patterns, and in order to provide consistency across all of the 6DKB variations, I’ve numbered the rows to correspond to the original 6-Day Kid Blanket. The cluster rows are always Row or Round 2 and 3, the dc rows are always Row or Round 5 and 6, and the sc rows are always Row or Round 4 and 7. This makes it easy to adapt any pattern to the many ways there are to stripe your 6-Day Kid Blanket.
The pattern starts with nine Setup Rounds which are only worked once. After that, repeat Rounds 2-7 until your blanket reaches the size you would like it to be. Do not repeat the Setup Rounds.
Changing Colors
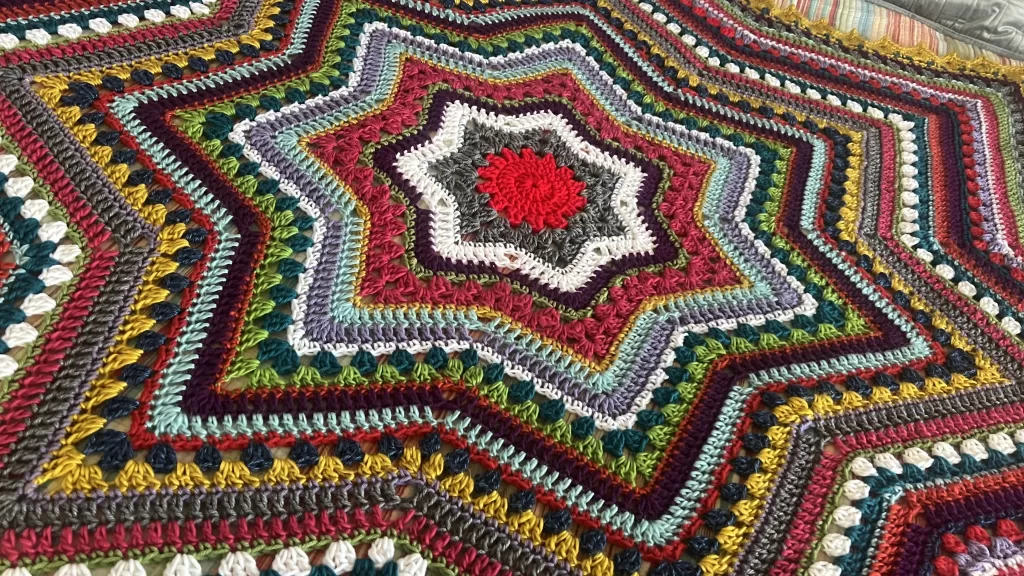
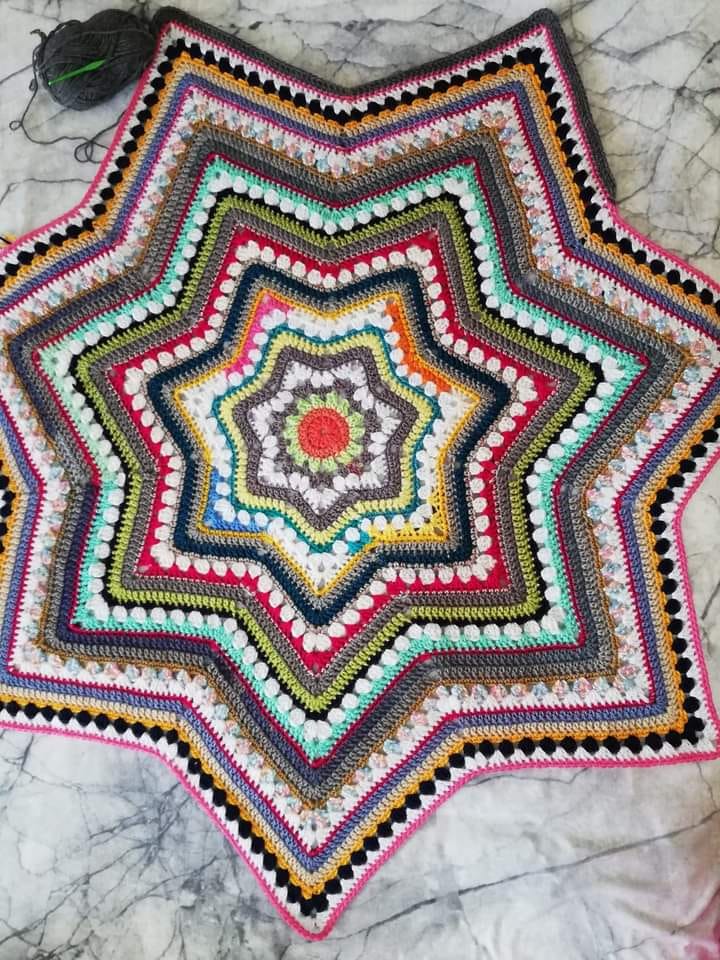
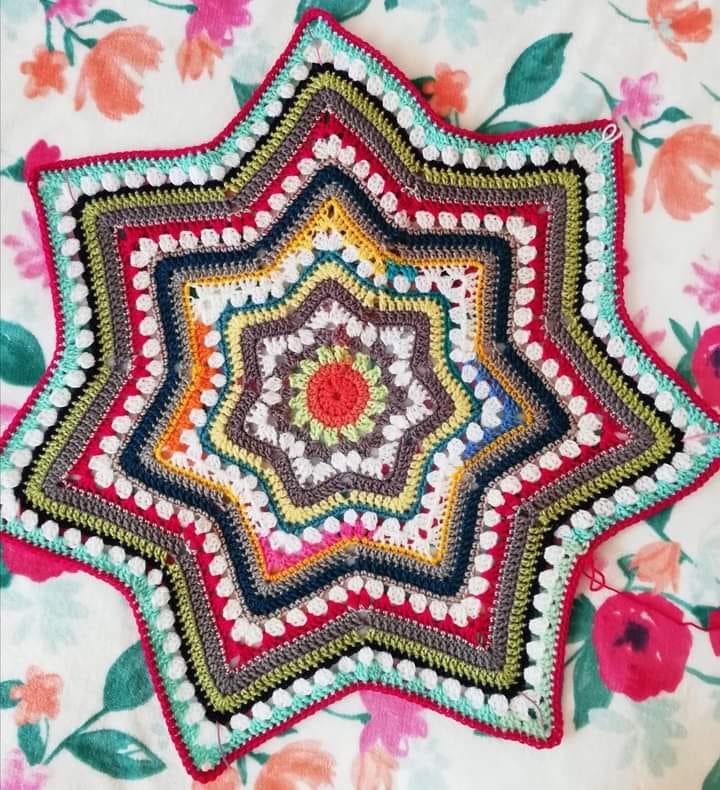
6-Day Crochet patterns can take on many different looks depending on which row or rounds the color changes fall on.
This pattern does not give specific color changes, but if you would like to reproduce some of the most well-known 6DKB stripes, see my article “No Two 6-Day Kid Blankets are Alike” for more information about how to to alter this pattern to create different looks.
The first 6-9 rows of this version look best when the yarn does not change colors in the middle of a round, so if you are using cake yarn, you may want to purchase an extra cake so you can cut colors for at least the first few rows. After the center is complete, mid-row color changes are not as obvious. Of course you can always change colors deliberately if you like.
When changing colors, fasten off the old color. Rotate the work and begin the next color with a standing stitch in a different valley.
Joining the rounds
Take care that you do not work into the sl st at the join of the round and create extra stitches. I recommend using stitch markers to prevent extra stitches being created.
Video Tutorials
This pattern has video tutorials on YouTube. The tutorials are meant to help you understand this pattern, but they are not intended to replace this pattern or be used without it.
Community Support
I am available on multiple social media platforms. The best way to get support is through my Facebook community dedicated to helping crocheters with the 6-Day Crochet Projects, loaded with free resources and people to answer your questions.
Join my membership community The Betty McKnitiverse for bonus content, exclusive 6-Day Star Blanket variations not published elsewhere, and ask your questions directly during one of my many community zoom calls.

This pattern is provided free with advertisements on this page. If you would like an ad-free .pdf, you can purchase one at the bottom of the page. The .pdf is the same as this pattern, with the exception of the ads.
Begin Pattern
With smaller hook, ch 4, join with sl st to form a ring (magic ring not recommended).
Setup Round 1: ch 3 (counts as dc, here and throughout), 13 dc into ring, join with sl st to top of ch 3. <14 dc>
Setup Round 2: ch 3, dc in same st. 2 dc in each st around. Join with sl st to top of ch 3. <28 dc>
Setup Round 3: ch 3, dc in next st, *ch 3, dc in next 2 sts, ch 1 **, dc in next 2 sts, repeat from * ending last repeat at **, join with sl st to top of ch 3. <28 dc, 7 ch-3 sps, 7 ch-1 sps>
Setup Round 4: sl st in next dc and ch-3 sp, (ch 3, 2 dc, ch 3, 3 dc) in same sp, *dc3tog in ch-1 sp, (3 dc, ch 3, 3 dc) in ch-3 sp, repeat from * around, dc3tog in last ch-1 sp, join with sl st to top of ch 3. <14 3-dc clusters, 7 ch-3 sps, 7 dc3tog>
If you experience curling during the setup rounds, change to a .5 – 1 mm larger hook. Remember to lay your work down after every round and admire it, and while you’re admiring, check for curling. If you do not experience curling, you do not have to change hooks.
Setup Round 5: sl st into the gap just below your hook, between the dc3tog and the 3 dc, (ch 2, dc2tog) in same sp, *(3 dc, ch 3, 3 dc) in ch-3 sp, **dc3tog in next 2 sps, repeat from * ending last repeat at **, dc3tog in last sp, join with sl st to top of dc2tog cluster (be sure to join in the top of the cluster and not to the ch 2). <14 3-dc clusters, 7 ch-3 sps, 14 dc3tog>
Setup Round 6: ch 1, sc in same st, sc in each st around, working 3 sc in ch-3 sps. Join with sl st to first sc (be sure to join to the top of the sc and not the sl st).<77 sc>
Setup Round 7: sl st in next st, ch 3, dc in next 3 sts, *(5 dc in center sc from row below), dc in next 4 sts,** sk 2, dc in next 4 sts, repeat from * ending last repeat at ** sk 2, join with sl st to top of ch 3. <91 dc>
Since we are always working from the right side, the top of the center st in the peaks lies not directly above, but slightly to the right of the center stitch.
Setup Round 8: sl st in next st, ch 3, dc in next 4 sts, *(5 dc in center dc from round below), dc in next 5 sts,** sk 2, dc in next 5 sts, repeat from * ending last repeat at ** sk 2, join with sl st to top of ch 3. <105 dc>
Setup Round 9: ch 1, sc in same st and each st around, making 4 sc in each peak in the center st of the 5 dc from the row below. Join with sl st to first sc. <126 sc>
Setup Rounds complete. Proceed to Round 2.
In order to make the row numbers correspond to the original 6-Day Kid Blanket row numbers, we are calling the next row Round 2. Round 2 corresponds to 6DKB row 2, and Round 3 to 6DKB Row 3, etc. Don’t let the change in sequence confuse you, proceed from Setup Round 9 to Round 2.
Proceed to Round 2.
Round 2: ch 2, dc2tog cluster in same st (mark this st), *[sk 2, 3 dc in next st] 2 (4, 6, 8, 10, 12, 14, 16, 18, 20) times, sk 2, (3 dc, ch 3, 3 dc) in third of 4 sc in peak, [sk 2, 3 dc in next st] 2 (4, 6, 8, 10, 12, 14, 16, 18, 20) times, sk 2, ** dc3tog in the next st (should be the very center of the valley) repeat from * ending last repeat at **, join with sl st to marked dc2tog (be sure to join to the top of the dc2tog and not the ch 2). <42 (70, 98, 126, 154, 182, 210, 238, 262, 290) 3 dc clusters, 7 ch-3 sps, 7 dc3tog>
Stitch counts in parentheses indicate subsequent repeats of the pattern.
Round 3: sl st in next sp, ch 2, dc2tog in same sp (mark this st), *3 dc in each of next 2 (4, 6, 8, 10, 12, 14, 16, 18, 20) sps, (3 dc, ch 3, 3 dc) in ch-3 sp, 3 dc in each of next 2 (4, 6, 8, 10, 12, 14, 16, 18, 20) sps, ** dc3tog in each of next 2 sps (one before and one after the dc3tog in the round below) repeat from * ending last repeat at **, dc3tog in last sp. Join with sl st to marked dc2tog. <42 (70, 98, 126, 154, 182, 210, 238, 262, 290) 3 dc clusters, 7 ch-3 sps, 14 dc3tog>
Round 4: ch 1, sc in same st, sc in each st around, working 3 sc in each ch-3 sp. Join w sl st to first sc. <20 (32, 44, 56, 68, 80, 92, 104, 116, 128) sc between each peak, 3 sc in each ch-3 sp>
Round 5: sl st in next st, ch 3, dc in next 9 (15, 21, 27, 33, 39, 45, 51, 57, 63) sts, *5 dc in center sc in peak, dc in next 10 (16, 22, 28, 34, 40, 46, 52, 58, 64) sts,** sk 2, dc in next 10 (16, 22, 28, 34, 40, 46, 52, 58, 64) sts, repeat from * ending last repeat at ** sk 2, join with sl st to top of ch 3. <20 (32, 44, 56, 68, 80, 92, 104, 116, 128) dc between each peak, 5 dc in each peak st>
Round 6: sl st in next st, ch 3, dc in next 10 (16, 22, 28, 34, 40, 46, 52, 58, 64) sts, *5 dc in center dc in peak, dc in next 11 (17, 23, 29, 35, 41, 47, 53, 59, 65) sts,** sk 2, dc in next 11 (17, 23, 29, 35, 41, 47, 53, 59, 65) sts, repeat from * ending last repeat at ** sk 2, join with sl st to top of ch 3. <22 (34, 46, 58, 70, 82, 94, 106, 118, 130) dc between each peak, 5 dc in each peak st>
Round 7: ch 1, sc in same st and each st around, making 4 sc in each center of 5 dc from the row below. (Since we are working on all right sides and not turning, the top of the center dc is above and slightly to the right of the center stitch). Join with sl st to first sc. < 26 (38, 50, 62, 74, 86, 98, 110, 122, 134) sc between each peak and 4 sc in each center dc st>
Repeat Rounds 2-7 for pattern, with approximately 3 repeats for baby blanket size, and 5 repeats for a throw size. Do not repeat the Setup Rounds.
Finishing
Work a round of rsc to edge the blanket, skipping one stitch every 4-5 stitches if your blanket edge ripples.
Beth McKee Elliott
aka Betty McKnit
Beth McKee Elliott, also known as Betty McKnit, is a crochet and knitting designer, instructor, community leader, and Master Somatic Movement Therapist and Educator. Her signature style, 6-Day Crochet, is showcased in the viral crochet patterns the 6-Day Kid Blanket and 6-Day Star Blanket.
She specializes in Somatic Crochet and Knitting, a mindfulness practice that combines crochet/knitting with body awareness techniques to prevent injury and promote well-being and creativity in crafting.
In addition to being a crochet designer, Beth is a choreographer. She is the creator and director of Small Plates Choreography Festival, Haven Movement Company, and the Dance Maker Podcast.
Join us in the 6-Day Kid Blanket Facebook Group for help with this pattern and to show off your finished creations. Be sure to tag @bettymcknit in your social media posts
Video tutorials available on my YouTube Channel.
This pattern may contain affiliate links. If you click these links and buy something on the page they take you to, I may, at no additional cost to you, earn a commission. I only affiliate with products and companies I feel good about. Thank you for your support!
This pattern is the intellectual property of Beth McKee Elliott aka Betty McKnit®. This pattern, The 6-Day Kid Blanket, “6DKB,” 6-Day Star Blanket™, and derivative works are protected by copyright. Publishing translations, corrections, variations, or tutorials of this pattern, online or elsewhere without written permission from the owner is a violation of copyright.
The original stitch pattern for the 6-Day Kid Blanket is “Vivid Chevrons”
#110 from 200 Ripple Stitch Patterns by Jan Eaton.
Reprinted with permission from Quarto Publishing.

An international community of yarnful makers and friends.
- Supportive community dedicated to the Power of Positive Crochet
- New pattern pre-releases
- Exclusive patterns never released to the public
- 3-5 patterns each month from Betty’s library (dripped out on pre-determined schedule)
- Somatic Crochet support and education
- Crochet alongs, knit alongs, and classes
- Weekly social and educational events and Zoom Hangout
- Bonus content every month
6-Day Star Blanket, crochet pattern, Betty McKnit, crochet blanket, seven-pointed star blanket, thrifted yarn projects, easy crochet patterns, quick crochet blanket, crochet for beginners, viral crochet patterns, DIY crochet blanket, fun crochet projects.