6-Day Man Blanket
6-Day Man Blanket
A variation of the classic crochet pattern the
6-Day Kid Blanket by Betty McKnit
This page contains affiliate links. If you click these links and buy something on the page they take you to, I may, at no additional cost to you, earn a commission. I only affiliate with products and companies I feel good about. Thank you for your support!
This pattern is provided free with advertisements on this page. If you would like an ad-free .pdf, you can purchase one at the bottom of the page. The .pdf is the same as this pattern, with the exception of the ads.
Introduction:
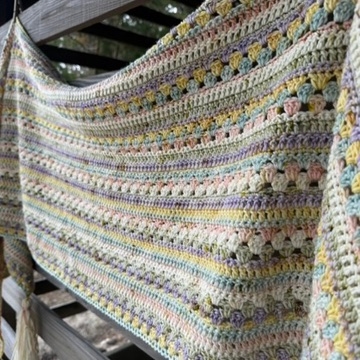
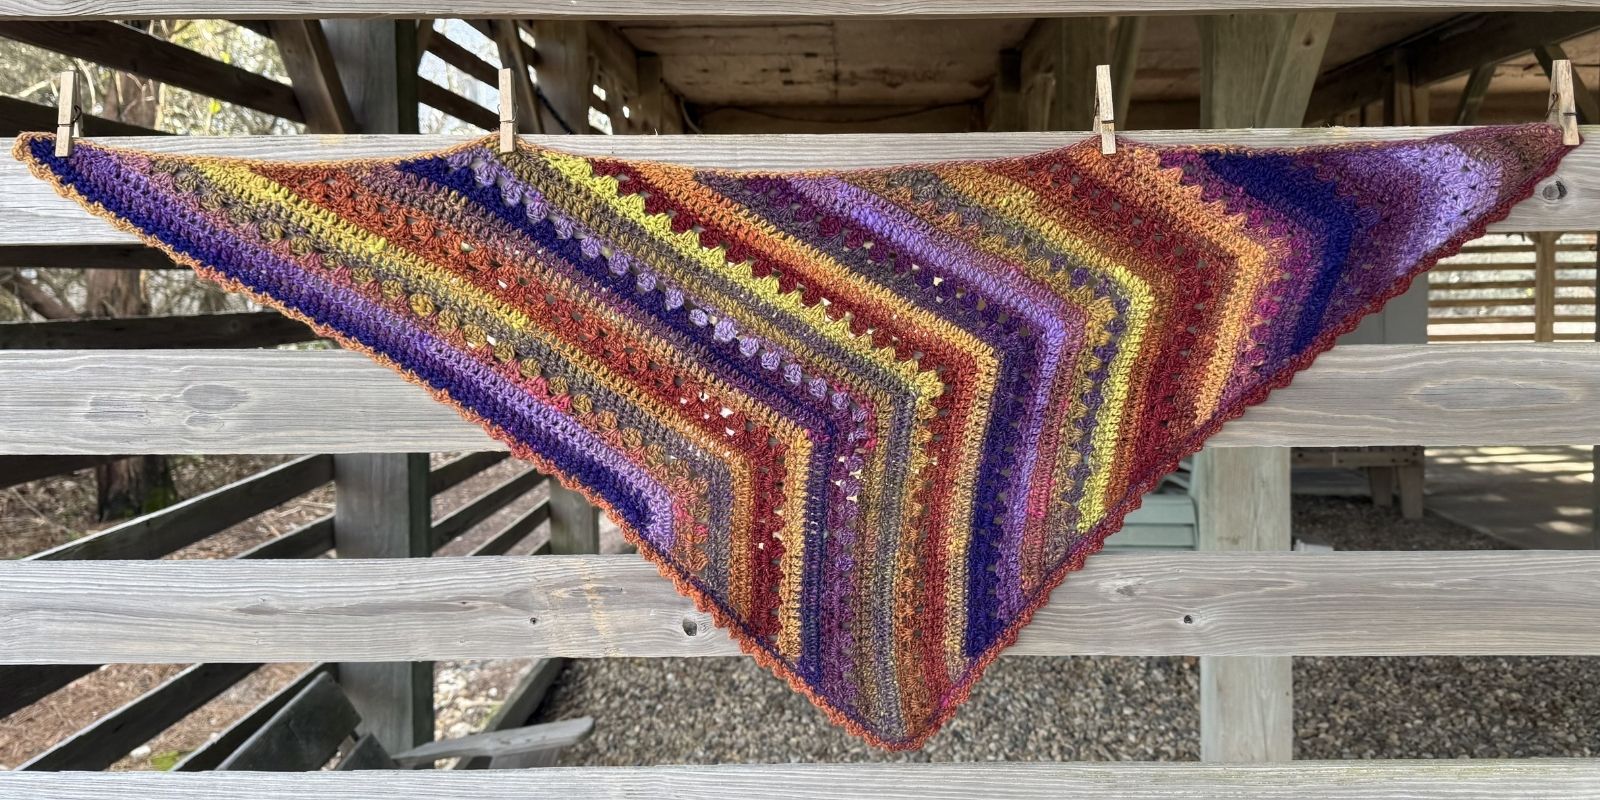
This pattern is a variation of the 6-Day Kid Blanket (6DKB) and was custom-designed by request for my former landlord in New York, a very special person to me. It makes a very large adult-sized blanket. I’ve chosen the colors, stripe, size and border to appeal to a masculine or gender-neutral aesthetic, but feel free to make it for anyone. Color has no gender, but this one is for the boys.
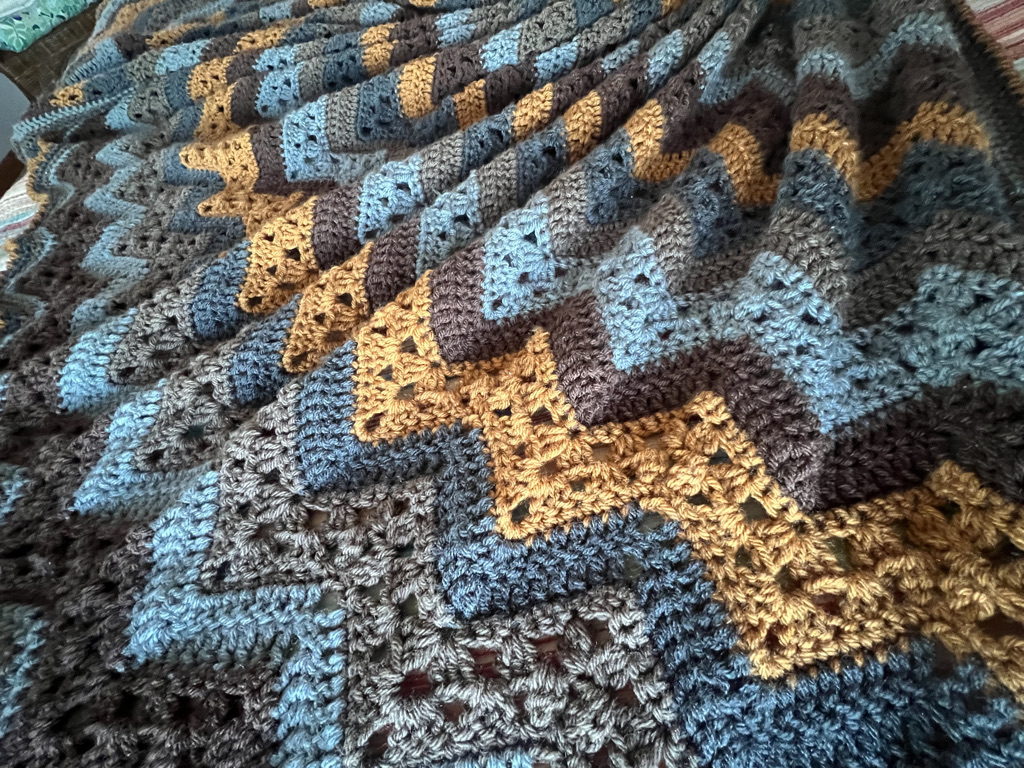
There are a variety of ways to alter the look of the 6DKB by changing colors on different rows. This variation is the classic original Vivid Chevrons.
I’ve created my own custom border based on ideas found in Edie Eckman’s book “Around the Corner Crochet Borders” and “Every Which Way Crochet Borders.”
What’s the difference between this pattern and the original 6DKB?
Size – this pattern makes an extra large adult-size afghan, the original made a toddler blanket.
Yarn Weight – this pattern uses worsted weight yarn, the original used chunky weight.
Edge and Border – this pattern has instructions for an edge and a custom-designed-by-Betty border, the original only gave instructions for tassels.
Stripes: this pattern uses the same striping method as the original pattern: the sc rows to make defined stripes, or “Vivid Chevrons.”
Details:
US Terminology with UK Conversion
Finished Size: 60” x 70” blanket
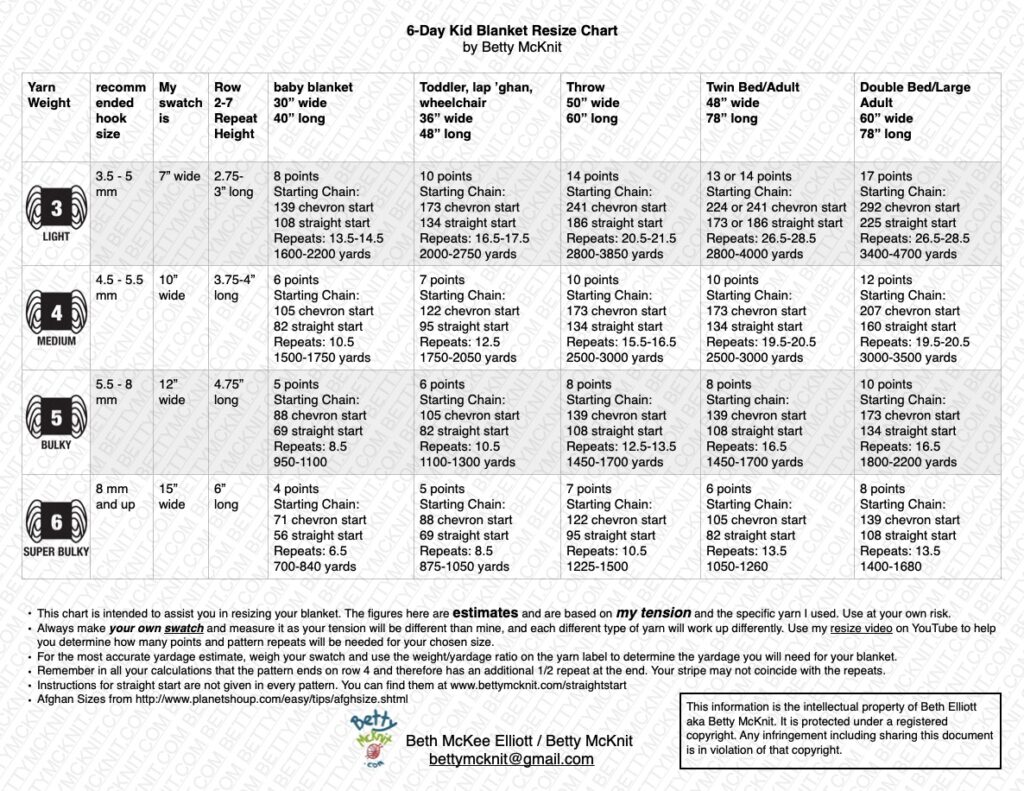
(see chart on last page for help making a blanket of a different size with a different weight of yarn)
Skill Level: Easy
| US terms abbreviation | UK terms abbreviation |
| single crochet sc | double crochet dc |
| half double crochet hdc | half treble crochet htr |
| double crochet dc | treble crochet tr |
Materials:
Yarn: 4250 yards of (4) worsted weight yarn.
850 yards of each of five colors.
Suggested Colors: 850 yards (5 skeins) of each of the following
Color A: Silver Grey (shown: Vanna’s Choice #860-149 – Silver Grey)
Color B: Taupe (shown in Vanna’s Choice #860-125B Taupe)
Color C: Dark Grey: (shown in Vanna’s Choice #860-151D Charcoal Grey)
Color D: Gold (shown in Vanna’s Choice #860-130 Honey)
Color E: Chocolate (shown in Vanna’s Choice #860-126 Chocolate)
Hook: K (6.5 mm) hook
(make a swatch to determine the best hook for your yarn).
Gauge: 12 st and 7 rows over 4” in DC
- My 37 st swatch was 10” wide and 7” long

Abbreviations:
ch: chain
dc: double crochet
dc3tog: (NOT TO BE CONFUSED WITH dec dc3tog).
Work dc3tog into one stitch – not over three stitches
[yarn over, pull up a loop, pull through two loops] 3 times. Yarn over, and pull through all 4 loops on the hook. (Be sure to pull up a loop in the same stitch every time.) dc3tog complete.
hdc: half double crochet
hhdc: herringbone half double crochet
rep: repeat
rhdc: reverse half double crochet
sc: single crochet
sk: skip
sp(s): space(s)
yo: yarn over
Special Stitches:
dc3tog: (cluster): yo, insert hook in next st, yo, pull up a loop, yo, pull through 2 loops, [yo, insert hook into same st, yo, pull up a loop, yo, pull through two loops] 2 times. yo and pull through 4 loops.
herringbone half double crochet (hhdc): yo, pull up a loop in the next st, continue pulling that same loop through the first loop on the hook, yo, pull through both remaining loops on the hook.
picot: sc, ch 3, sc in side of sc just made. Picot complete.
reverse half double crochet: work hdc from left to right instead of right to left.
Repeats
( ) Work stitches in parentheses in the same st or sp.
[ ] Repeat everything within the brackets the indicated number of times.
*Indicates beginning of repeat
Some things to consider before you start:
Does it really only take 6 Days to make?
This variation on the 6DKB uses the very same stitches as the original, but uses a different weight yarn and is much larger and therefore will probably take you longer than six days to make. The original toddler blanket made with chunky yarn only took six days. I suggest giving yourself at least two weeks to make this blanket.
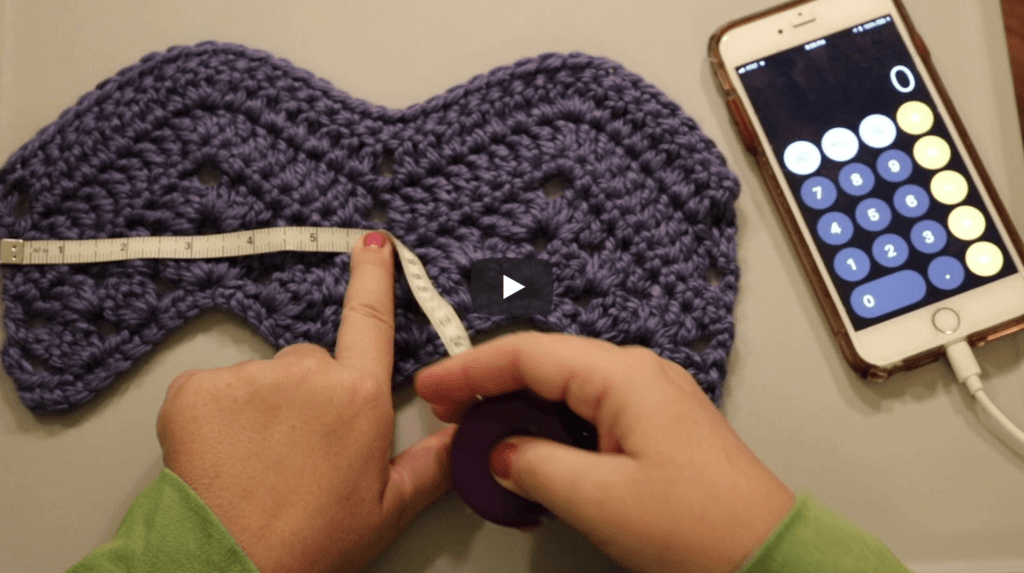
Swatch First
Before you begin, I suggest you make a swatch on 37 chains while following along with my video tutorials on my YouTube Channel. I know you probably never swatch and will be tempted to bypass this advice, but take my word for it. The first few rows are a little tricky and You’ll sidestep common mistakes and avoid the frustration of frogging hours of hard work by swatching along with my tutorials before starting your blanket. I also have a Facebook Group and a Membership Community to help you if you get stuck.
How to Resize
This pattern creates an adult man-sized 60 x 70” throw sized blanket. If you would like make this blanket in a different size, please make a swatch, measure the swatch and use the chart at the end of this pattern as well as my 6DKB Resize Video to figure out your starting chain and yardage.
Stripe Symmetry
Remember that the blanket ends on row 4 and therefore has an extra half repeat at the top. The shape of the top of the blanket will not match the bottom if you finish on row 7. Be aware of this as you plan your color repeats.
Changing Colors:
No two 6-Day Blankets are alike. The 6-Day Crochet stitches can take on many different looks depending on which rows the color changes fall on. This pattern utilizes the original 6-Day Kid Blanket striping method called Vivid Chevrons. If You would like to use this pattern variation with another striping method, please see my article “No Two 6-Day Kid Blankets are Alike” for more information about how to to alter this pattern to create a different stripe.
To change yarn on color changes, draw the new color through the last two loops of the last stitch of the row before the color change.

To change yarn on color changes, draw the new color through the last two loops of the last stitch of the row before the color change.
Creating a straight top and bottom edge:
This version creates a chevron top and bottom edge. If You would like a straight top and bottom edge, You will have to make alterations not given in this pattern. Please see my website articles “How to start Your 6-Day Kid Blanket with a Straight Edge” and “6DKB Straight Start Questions Answered.” Be sure to account for extra yardage.
Side edges:
Some crocheters have had issues with the side edges of their blankets curling. Here are some steps you can take to help alleviate this:
- When working the last stitch of the row, insert the hook from back to front, instead of from front to back.
- If your tension is tight, you can ch 4 instead of 3 to turn and replace dc at the end of the rows with edc. Adding these extra stitches may cause your edging to ruffle, in which case you may need to skip sts when working your edge.
- Work your edge into the turning chains and sc/dc stitches on the sides of the work as described at the end of this pattern, rather than into the spaces.
- Wash your blanket once it is complete, and lay it out flat to dry, gently stretching and shaping the edges.
Begin
With Color A, ch 190
(To make your blanket larger or smaller, chain a multiple of 17 + 3)
Row 1: (RS) 1 sc into 2nd ch from hook, 1 sc into each ch to end. 189 sts
Turn
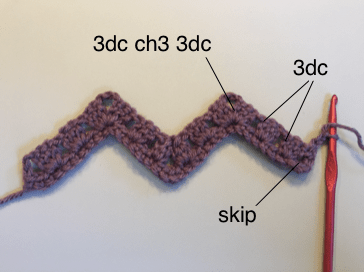
Row 2: ch 3, sk 3, (the first stitch of the row counts as 1, here and throughout.) [3 dc in next st, sk 2] twice, (3 dc, ch 3, 3 dc) in next st, *sk 2, 3 dc in next st, sk 2, dc3tog, sk 4, dc3tog, sk 2, 3 dc in next st, sk 2, (3 dc, ch 3, 3 dc) in next st. Rep from * to last 9 sts, sk 2, [3 dc in next st, sk 2] twice, dc in last st.
Turn
Row 3: ch 3, sk sp between turning ch and next 3-dc group, 3 dc in each of next 2 sps, (3 dc, ch 3, 3 dc) in next ch-3 sp, *3 dc in next sp, dc3tog in next sp, sk next sp, dc3tog in next sp, 3 dc in next sp, (3 dc, ch 3, 3 dc) in next ch-3 sp, rep from * to last 3 sps, 3 dc in each of next 2 sps, dc into sp between last 3 dc group and turning ch.
Turn
Row 4: ch 1, sc in first st of the row, sk 1, sc in next 8 sts, *3 sc in next ch-3 sp, sc in next 14 sts, repeat from * to last ch-3 sp, 3 sc in last ch-3 sp, sc in next 8 sts, sk 1, sc in top of turning ch.
Turn
Change to Color B
Row 5: ch 3, sk 2, dc in next 8 sts, *3 dc in next st (You should be working into the center stitch of the 3 sc. If not, you may have skipped incorrectly in the beginning of the row, or missed the sk 1 at the end of Row 4.) dc in next 7 sts, sk 2, dc in next 7 sts, rep from * to last 11 sts, 3 dc in next st, dc in next 8 sts, sk 1, dc into last st.
Turn.
Row 6: ch 3, sk 2, dc in next 8 sts, *3 dc in next st (you should be working into center stitch of 3 dc), dc in next 7 sts, sk 2, dc in next 7 sts, rep from * to last 10 sts, 3 dc in next st, dc in next 8 sts, sk last dc, dc in top of turning ch.
Turn.

Change to Color C
Row 7: ch 1, sc into first st, sk 1, 1 sc into each st to last dc, sk last dc, sc in top of turning ch.
Turn.
Repeat rows 2-7 seventeen times, for a total of 18 repeats of the pattern, working color changes as follows: Row 2 – 4 – Continue on Color C, Rows 5-6, change to Color D, Row 7 – 4, change to Color E. Continue colors in sequence (ABCDE) changing to the next color on each row 7 and 5. The diagram at right is color coded and shows the rows done in each color.
Repeat rows 2-4 one time more time, with color changes as before. The blanket ends on Row 4.
Fasten off. Proceed to Edge Rounds.
Edge Round 1: Join Color E in any stitch, work a row of sc around the blanket, working 3 sc into each corner and every point on the top and bottom of the blanket.
When working sc into the sides of the blanket, use the turning chains, the sc and dc stitches as foundation chains and work under 2 threads of each stitch and leave one thread below.
There is no set rule for how many stitches you should put into the side of each stitch. If you chained 4 to turn or did edc so that your edges would not curl, you probably will have to skip some stitches periodically. Find out what works for your tension. Lay your work down often and check to make sure that your edge does not ruffle (too many stitches) or pull (too few).
Join with a sl st to the first stitch. Fasten off.
Edge Round 2: Join Color A with standing hhdc to any stitch along the side of the work.
I like to start new rounds in different places so that I don’t have a bunch of ends lines up in one area of the work. You can start anywhere on either side; pick a new place each time.
hhdc around, working 3 sts each corner and peak and sk 1 in each valley. Join w sl st to first hdc. Fasten off.
Repeat Round 2 with Color B and Color C.

Edge Round 3: Join Color D with standing hdc to st. Work rhdc around, skipping stitches as needed to avoid curling. Join with sl st to first hdc. Fasten off.
Weave in all ends.
Beth McKee Elliott
aka Betty McKnit
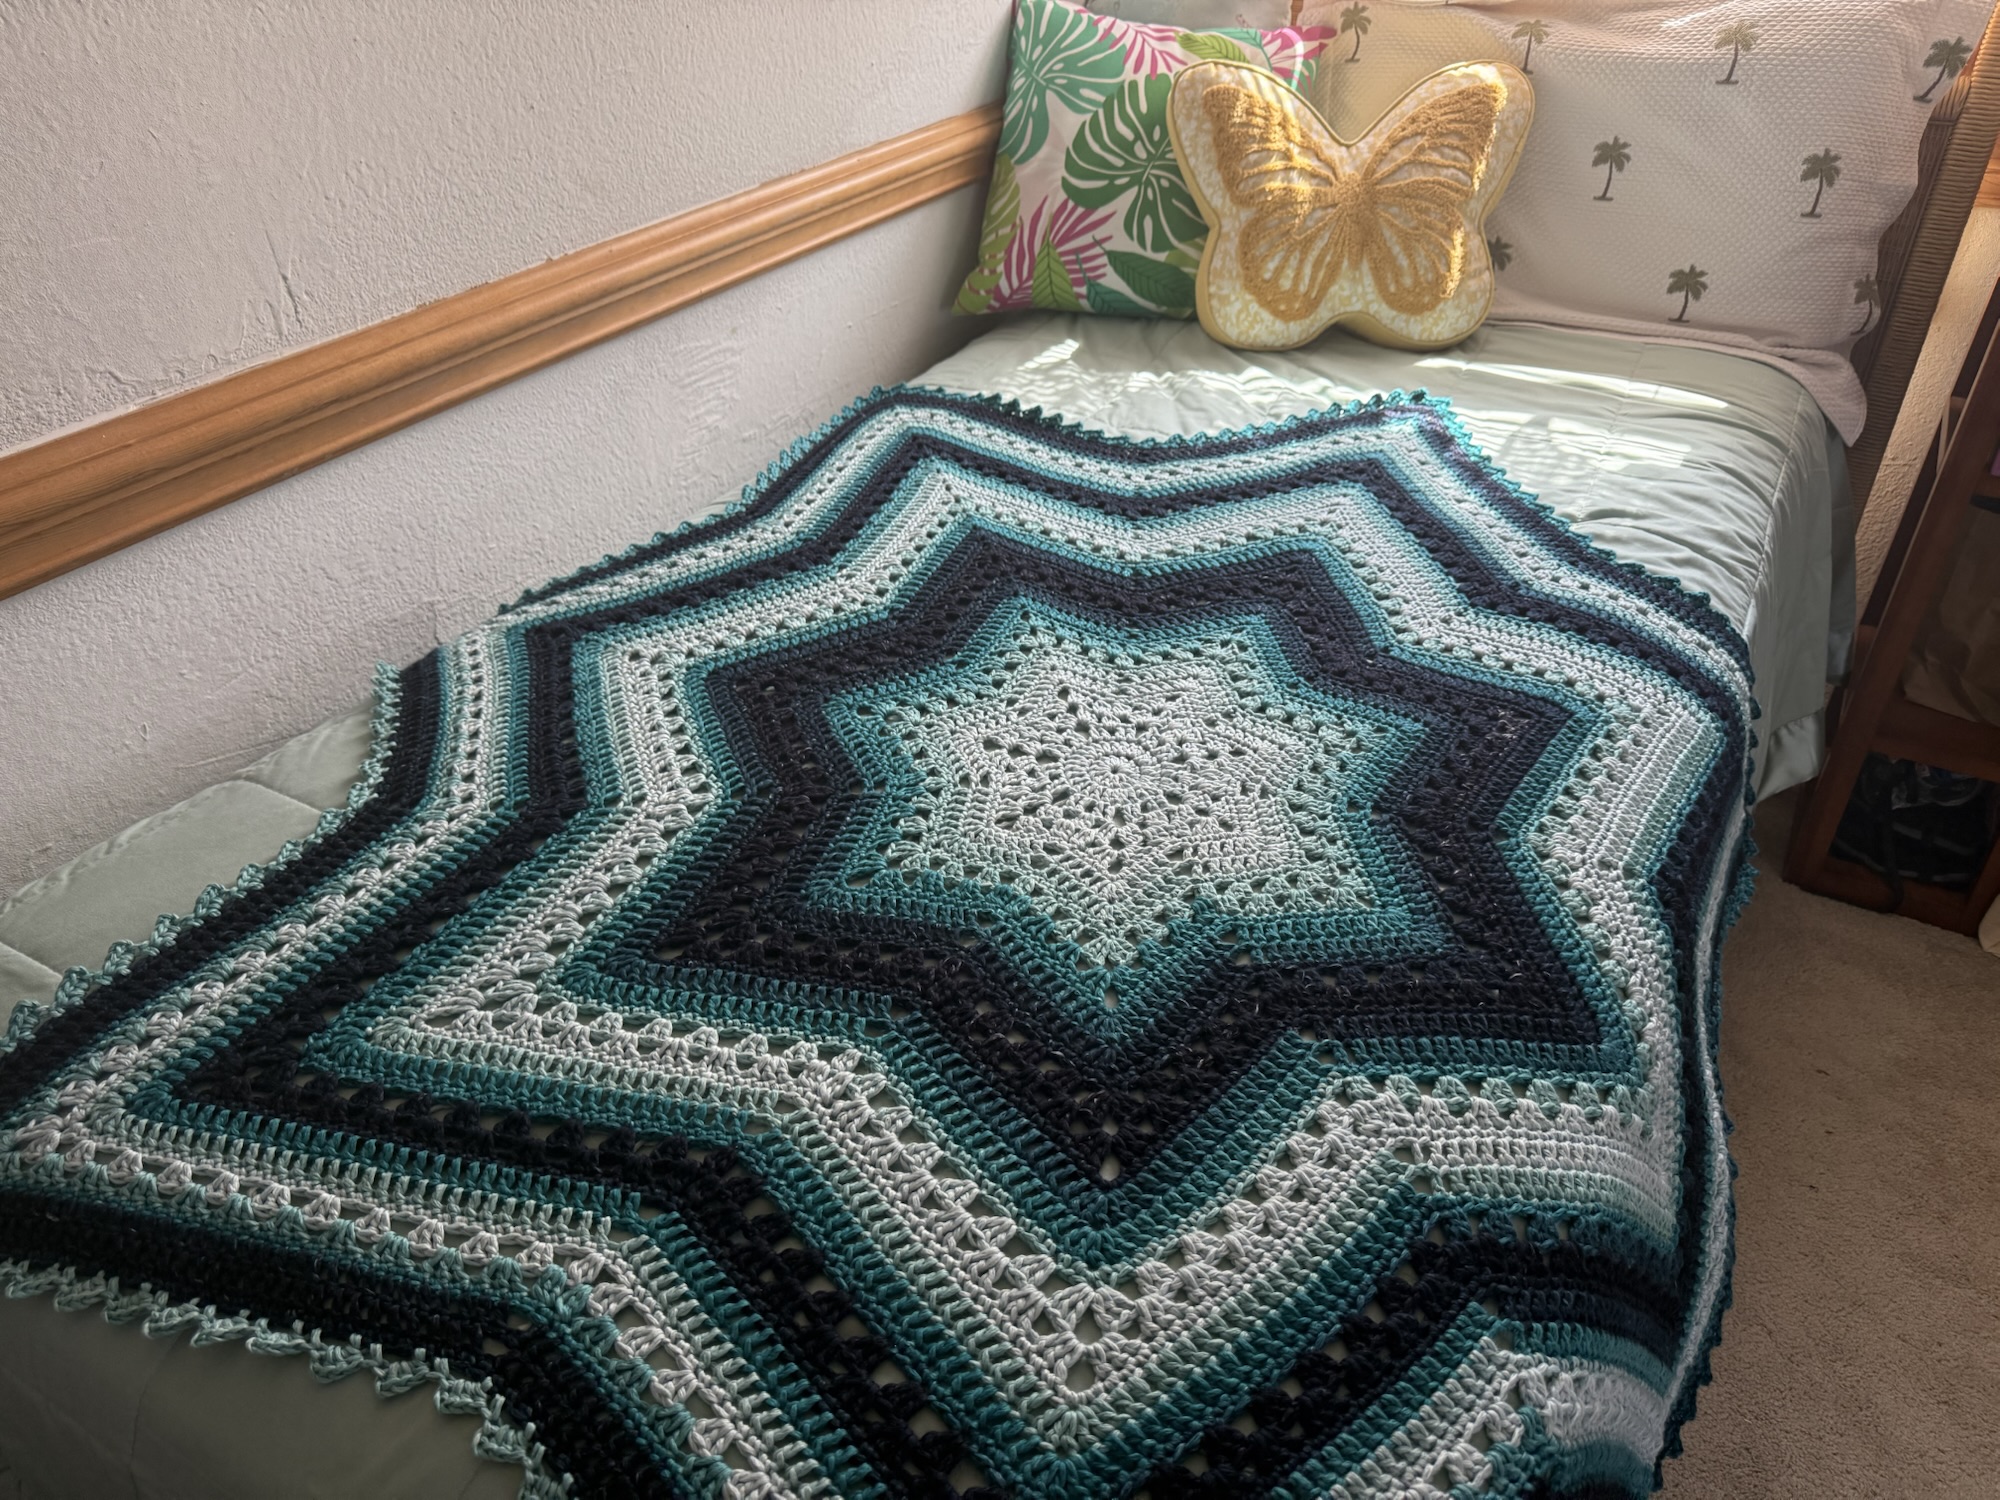
Beth McKee Elliott, also known as Betty McKnit, is a crochet and knitting designer, instructor, community leader, and Master Somatic Movement Therapist and Educator. Her signature style, 6-Day Crochet, is showcased in the viral crochet patterns the 6-Day Kid Blanket and 6-Day Star Blanket.
She specializes in Somatic Crochet and Knitting, a mindfulness practice that combines crochet/knitting with body awareness techniques to prevent injury and promote well-being and creativity in crafting.
In addition to being a crochet designer, Beth is a choreographer. She is the creator and director of Small Plates Choreography Festival, Haven Movement Company, and the Dance Maker Podcast.
An international community of yarnful makers and friends.
- Supportive community dedicated to the Power of Positive Crochet
- New pattern pre-releases
- Exclusive patterns never released to the public
- 3-5 patterns each month from Betty’s library (dripped out on pre-determined schedule)
- Somatic Crochet support and education
- Crochet alongs, knit alongs, and classes
- Weekly social and educational events and Zoom Hangout
- Bonus content every month